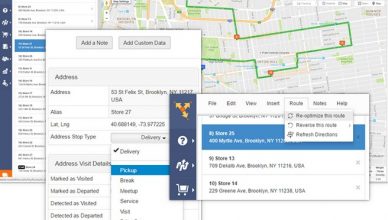
With over a million businesses using Route4Me’s vehicle route planning solution in the last seven years, it is one of the most popular fleet routing programs in the world.
The reason for this popularity is simple: Route4Me’s vehicle route planning software is a customer-focused service.
Usually it takes a lot of training for employees to get used to such software. The service provider might even need to send some trainers over to make sure everything goes smoothly. You’ll need a lot of training if the software is complicated, or else your drivers will be confused and unproductive for weeks or even longer as they try to teach themselves how to use the software, and that would really put a hurtin’ on your bottom line.
Of course, the more time you spend on training, the fewer hours you have to be productive.
Route4Me route planner is more intuitive than most vehicle route planning programs – your drivers will know how to use most of the core features right away. There’s no need to go through hours and hours of training to start using our service.
It also comes with a free onboarding program, which is supported by dedicated onboarding specialists who will walk you through the service.
The following article explains our onboarding program in detail:
RELATED: Painlessly Switch to Route4Me With These Onboarding Best Practices
With Route4Me, you don’t need to know how to use every single feature to successfully plan routes. You might only need the basic stage of Route4Me, or you might find the intermediate and advanced stages useful… it all depends on your specific needs.
We’re getting a little ahead of ourselves here, though. You don’t even know what the stages are! Let’s review:
Stage 1
Plan a Route for a Single Driver
Some businesses only have one or a handful of drivers.
These businesses are often overwhelmed by their routing software’s plethora of features, most of which they don’t need.
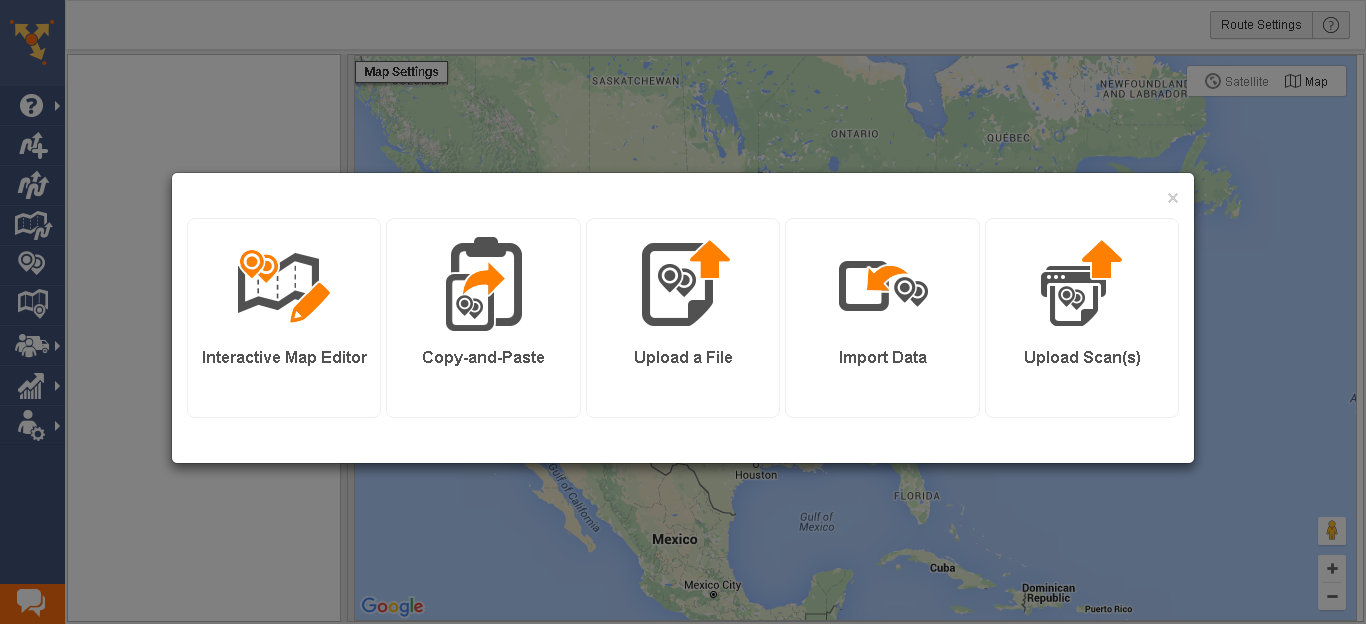
That’s not a problem with Route4Me’s routing optimization software. It comes with a simple, easy-to-use interactive map editor that you can use to plan routes for one driver, as shown below.
Plan Routes for Multiple Drivers
Upload Your Contact Files
Planning routes for a single driver is easy. Scheduling multiple deliveries across the city with several different drivers? Not so much.
RELATED: How Routing Optimization Software Can Help You Overcome the Challenges of Managing Multiple Drivers
This task is especially difficult if you still plan your routes with pen and paper.
How difficult? Allow us to illustrate: Let’s say you plan your routes without vehicle route planning software and you have seven drivers with 25 deliveries to make in New York and 30 deliveries to make in New Jersey. How would you plan the fastest routes in this situation?
Using a GPS is not a good option when you have multiple drivers, as you would need to upload the addresses manually.
And what if your drivers are unfamiliar with the areas you’re sending them too? Drivers getting lost will delay deliveries, which will upset customers, which in turn will damage your reputation and your ability to attract new customers.
Traffic and weather conditions may delay your drivers as well.
Trying to adjust your routes to account for all of those factors takes an enormous amount of time when you try to do it by yourself, and it’s easy to make mistakes during such a tedious process.
Why bother? Route4Me’s route optimization software considers all of those aforementioned factors and creates 100% optimized rotues for you in 30 seconds or less.
To do this, you can use our “Upload a File” feature, which enables you to upload all your addresses with just one click.
Once your addresses are uploaded, Route4Me will automatically do all the complex calculations involved and give you the best routes possible.
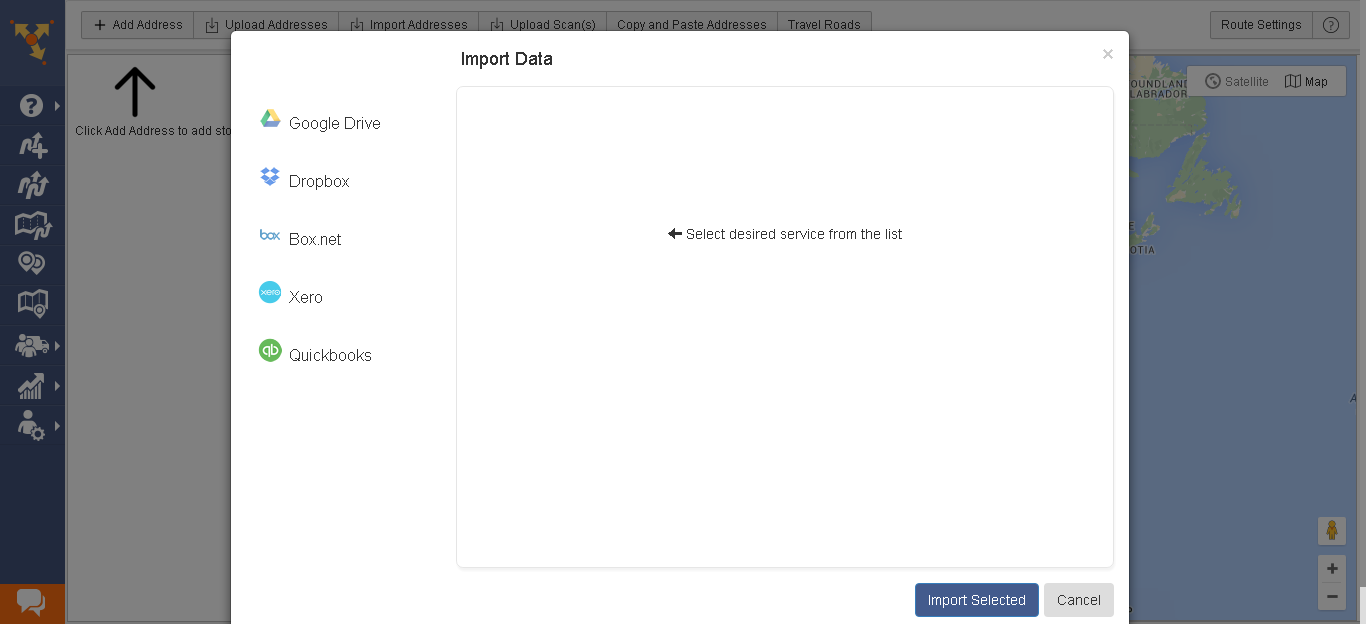
Route4Me also comes with an “Import Data” feature. This allows you to import data from your other online accounts, including:
- Google Drive
- Dropbox
- Box
- Xero
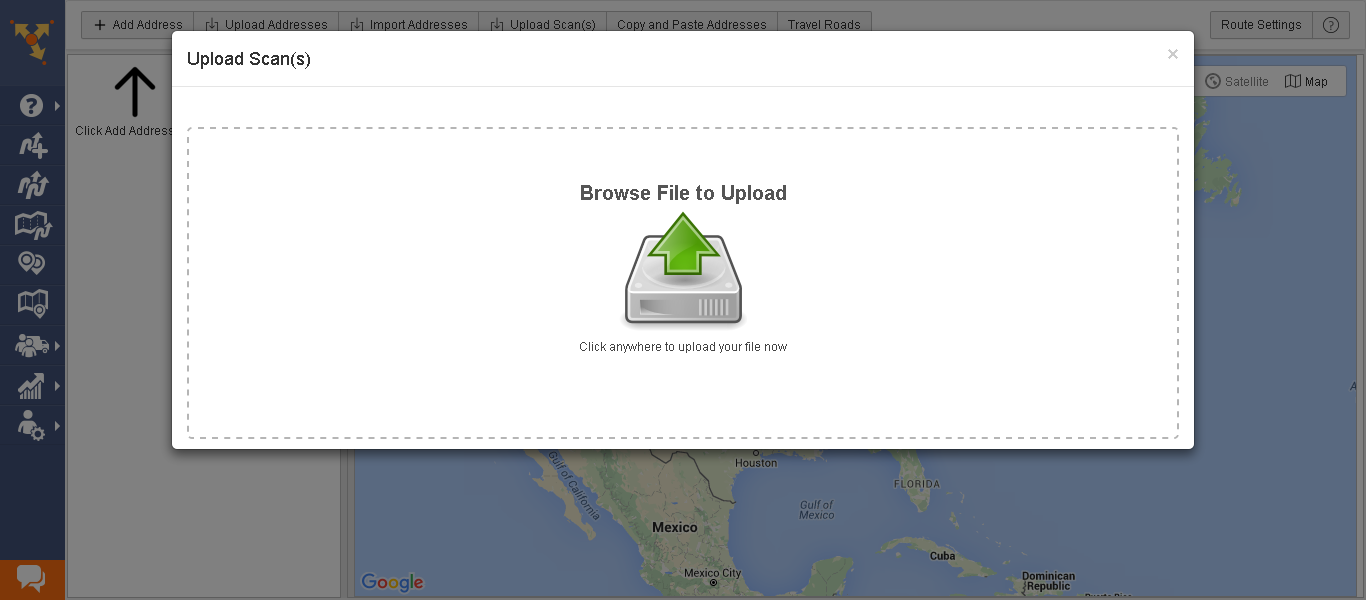
You can even upload a scanned copy of a paper document containing your addresses. Easy, right?
Share Routes with Drivers
When you plan routes manually, sharing routes with your drivers takes a lot of time. You need to call a meeting, guide them through the routes, help them understand the instructions, answer all their questions… and if you have dozens of drivers, helping each one understand their route gets very old very fast.
Here’s how you can use Route4Me’s fleet route planning software to make this process faster and easier:
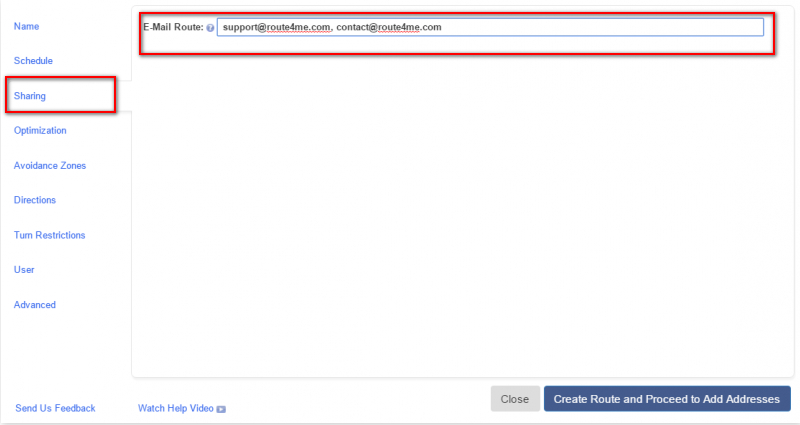
Share Routes Via Email
You can send your drivers their routes via email by simply entering their email addresses. The drivers will then be notified of all the details of the routes they’ve been assigned to. You can find this feature under the “Sharing” option in the route editor.
Route4Me’s route scheduling software is built around our mobile app. You can send updates to your drivers’s smartphones – all they need to do is install the Route4Me app on their phones. This way, you don’t need any printed copies or extra GPS devices.
Assign a Route to a Specific User
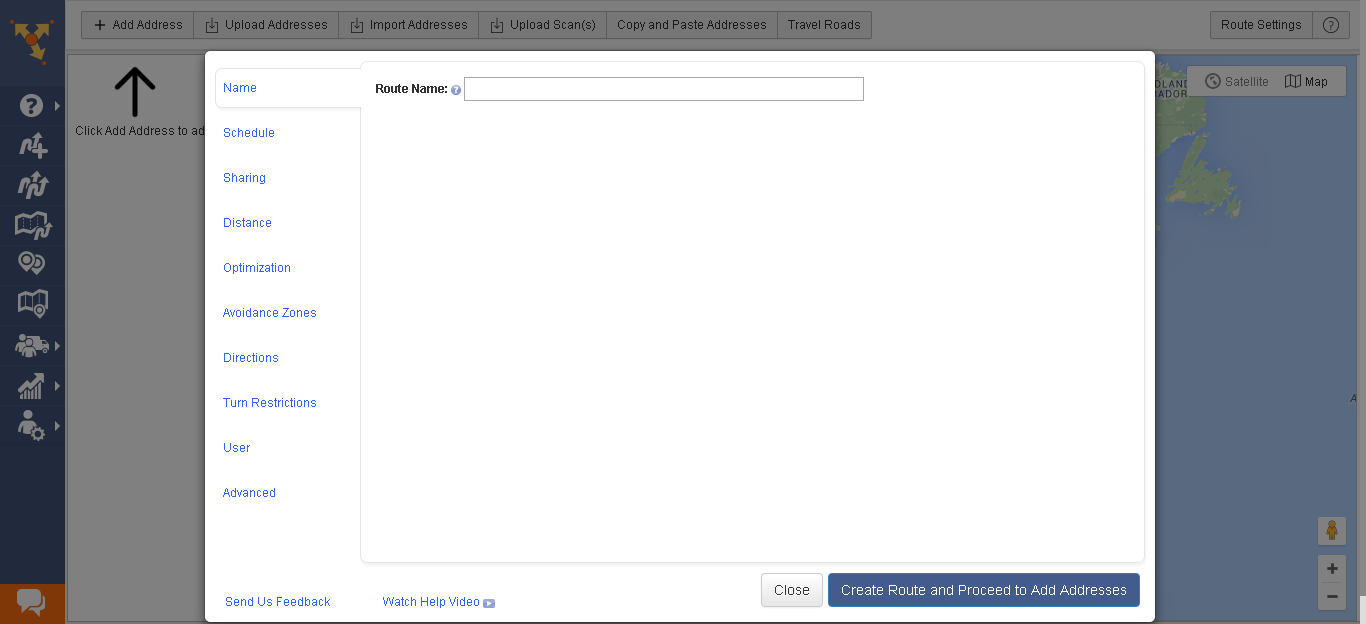
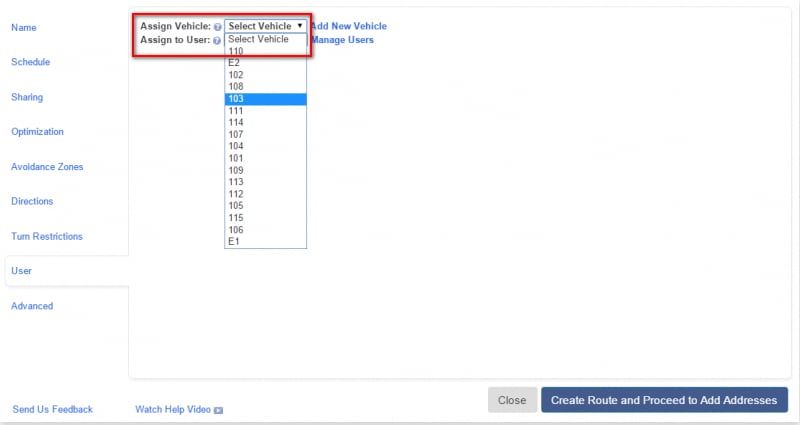
Here’s how to share a route with a specific driver – first, hover over the route editor and click the “User” option. These two options will come up:
- Assign Vehicle
- Assign to User
Select the preferred driver from the dropdown list. Then select the “Create Route and Proceed to Add Addresses” option at the bottom.
Don’t forget to select a vehicle for accurate fuel expense tracking.
Meanwhile, if you change anything on your desktop app, the changes you make will automatically sync to the driver’s app – no need to take the time to share the changes with them manually.
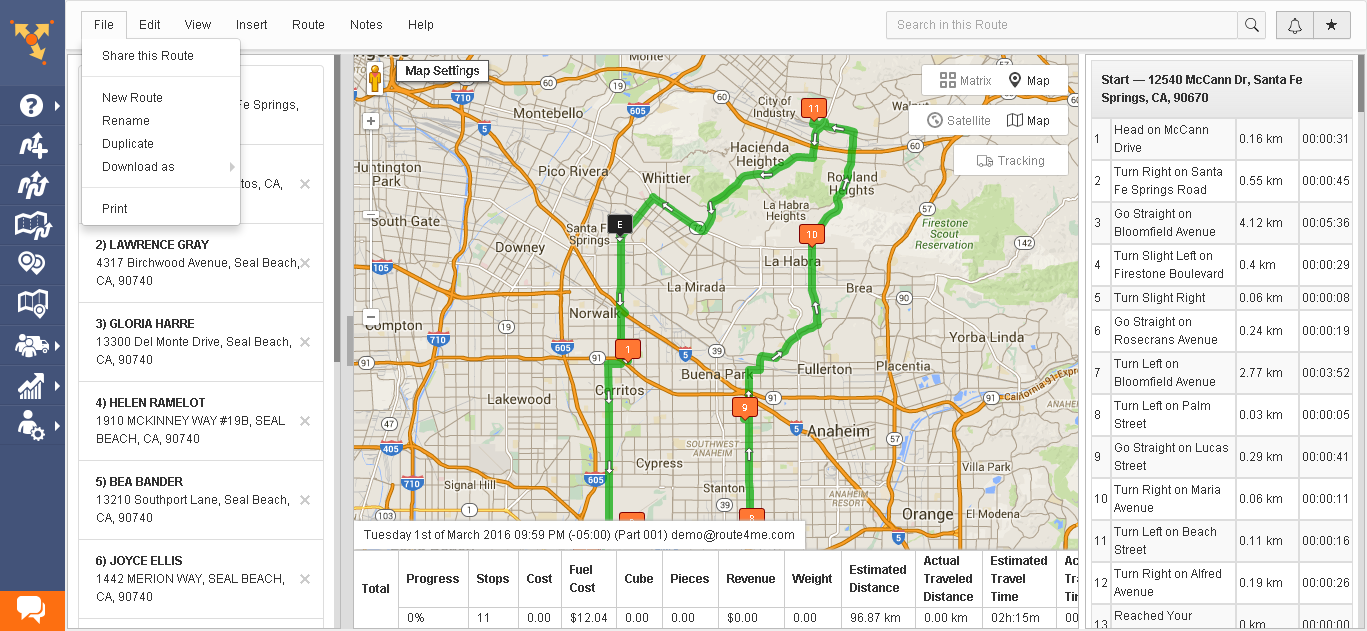
Print Your Route
If you still prefer sharing hard copies of the routes with your drivers, you can do so with Route4Me.
- Go to the “Routes List” option under the “Plan New Routes” section in the left sidebar
- Select the route you want to print
- Open the “File” menu and select “Print” at the bottom
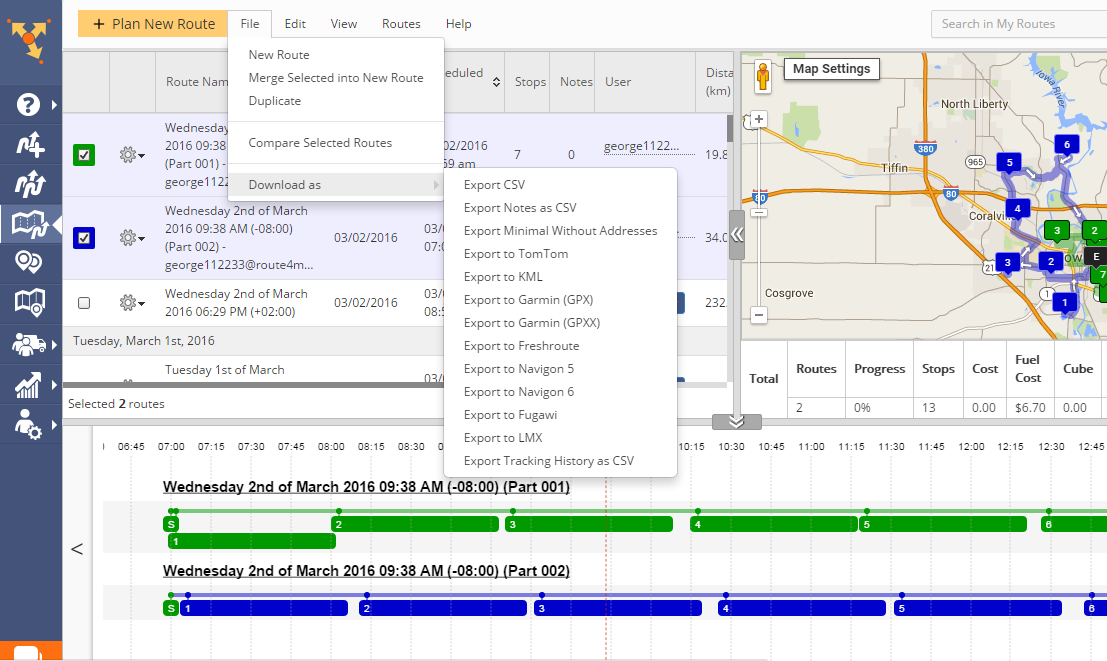
Upload to a GPS Device
If your drivers can’t or won’t use the mobile app, don’t worry, we got you. Route4Me’s vehicle route planning software allows you to upload the routes directly to your drivers’ GPS devices.
Like earlier, go to the “Routes List” option, click on the route, and open the “File” menu.
You’ll see the “Download As” option, and from there you can export the route directly to your GPS devices.
Add Notes and Images
Sometimes, a driver needs more information than just an address to properly make a delivery.
For example, consider the case of a driver dropping off supplies at a hospital. Hospitals are big facilities with multiple entrances: there’s the main entrance for patients, another entrance for ambulances, etc. All the time your driver takes to circle around the building and find the right entrance makes it harder for them to make the rest of their deliveries for the day on time.
How do you keep track of this special information? You could write it on a piece of paper, but it’s easy to lose a piece of paper.
Here’s a better way: Route4Me’s “Add Note” feature.
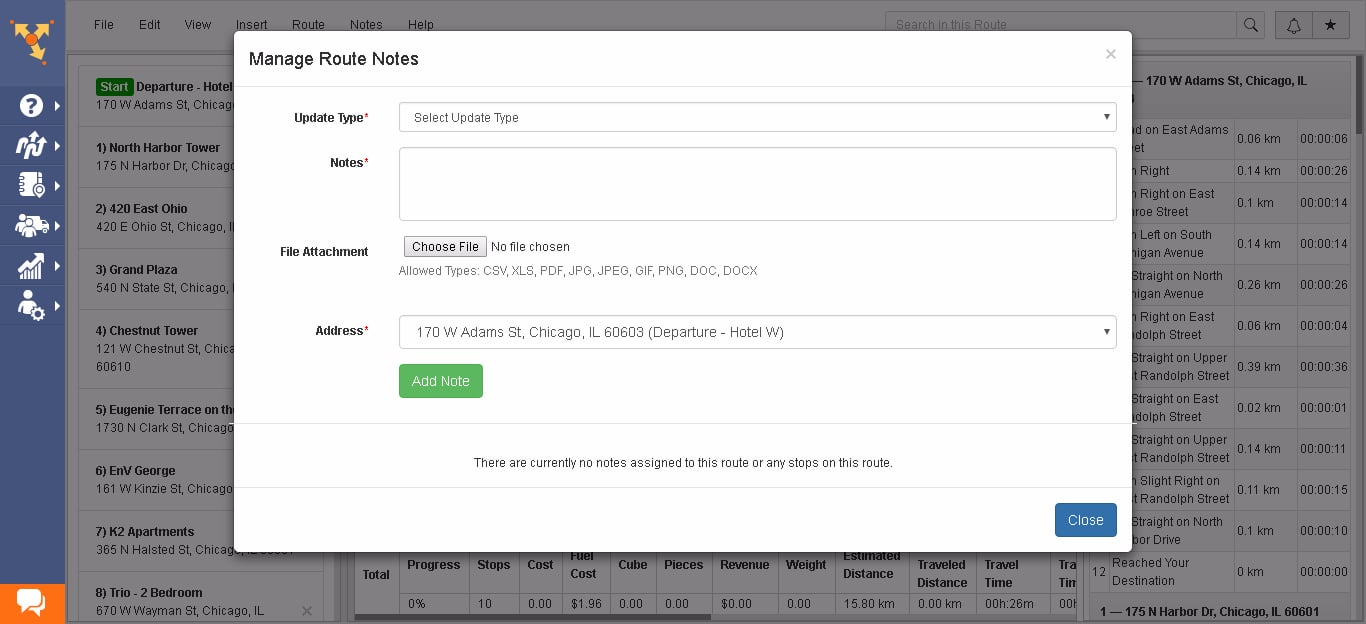
Your drivers and salespeople can add and update notes in real time. They can even include images with these notes to add context. And all these notes are centralized, so you and your drivers can see them any time, anywhere.
Here’s how to add a note or image:
- Go to the “Routes List” section in the left sidebar under “Plan a New Route”
- Click on the route you want to add a note to
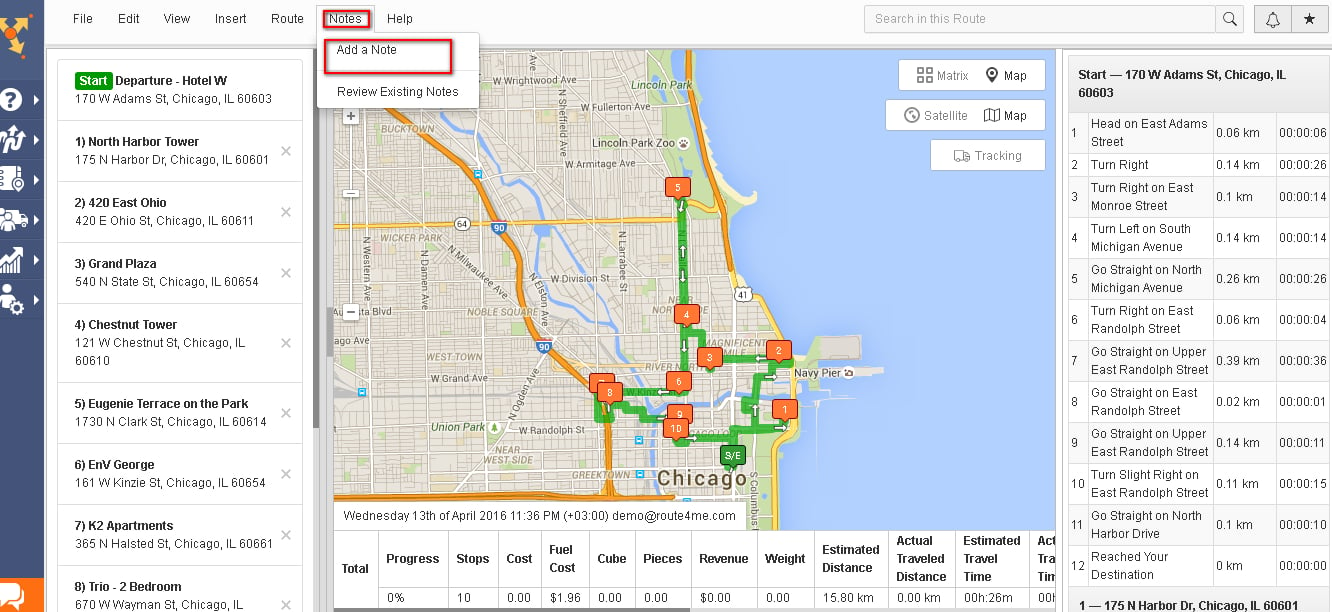
- In the menu, you’ll see the “Notes” option just before “Help”
- Select “Notes” and then select the first option, “Add a Note”
To learn how to add notes from your mobile app, read the following tutorial:
RELATED: Adding Notes to a Visited Address
Stage 2
Team Route Planning
Managing a team is much easier than managing individuals. Instead of contacting every driver for queries and updates, you only have to contact your team leaders, which saves an enormous amount of time.
Route4Me’s vehicle route planning software makes it easy to manage your team.
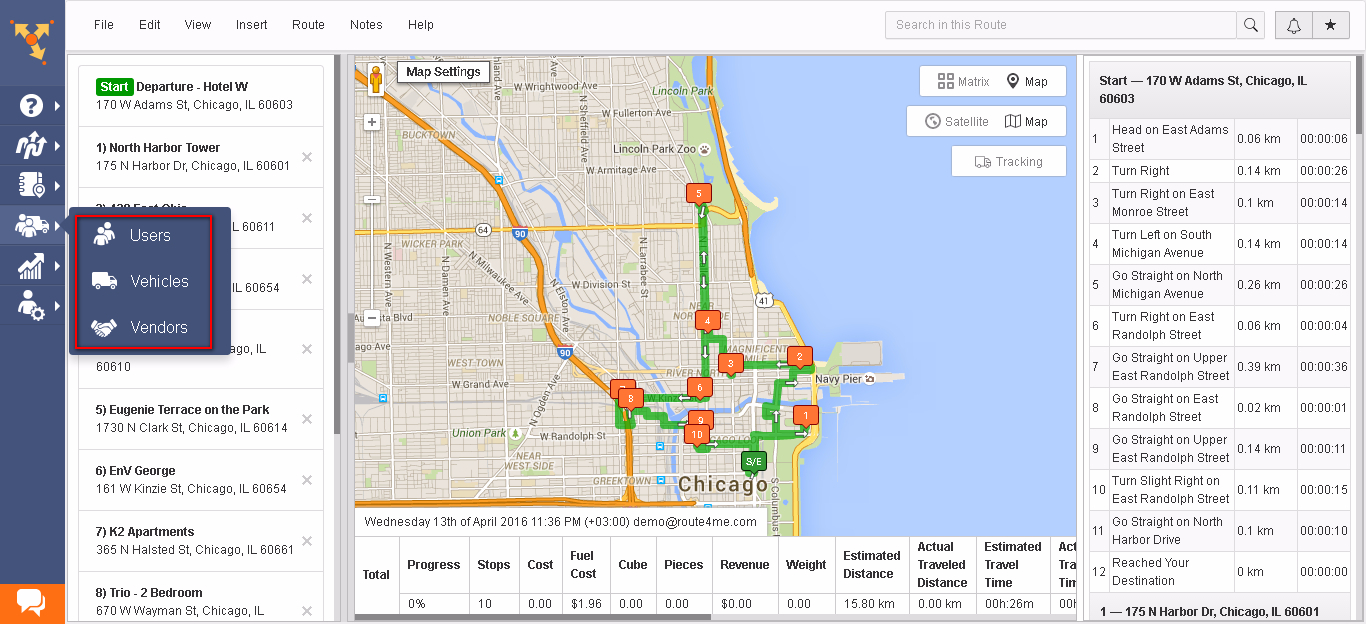
- Go to the “Team” section on the left sidebar. When you select it, you’ll see three options: “Users”, “Vehicles”, and “Vendors”.
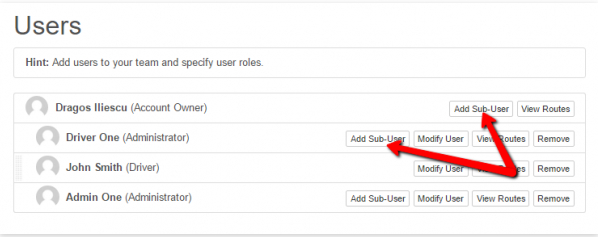
- Click on “Users” and you’ll see all the users in your team. You can add a team member by adding a sub-user under their team leader. You can also modify each user.
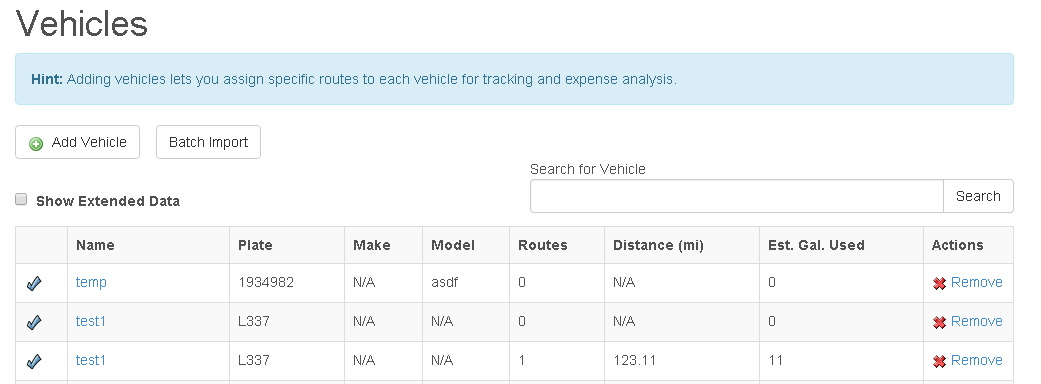
- Click the “Vehicles” options to add vehicles, and then fill in all the necessary information.
- To assign routes to a vendor, click “Add Vendor”.
Time-Window Constraints
As per FMCSA, a driver can only drive for a maximum of 11 hours, and they’re only allowed to hit that 11 hour mark if they were off-duty for 10 consecutive hours before their shift. Any violation of this rule can lead to a hefty penalty.
When you plan your routes with pen and paper, it’s nearly impossible to keep track of exactly how long your drivers have been on the road.
Switching over to routing software can help – but not every vehicle route planning program has a feature designed to address this issue
Route4Me does, though.
RELATED: How Time Window Rules Can Revolutionize Your Vehicle Route Planning
Want To See For Yourself How Route4Me Can Boost Your Profits?
Whether you want to slash the time it takes you to plan routes for your drivers, increase the number of stops they can make, or keep your customers satisfied knowing that your drivers show up on time… Route4Me helps you achieve that!
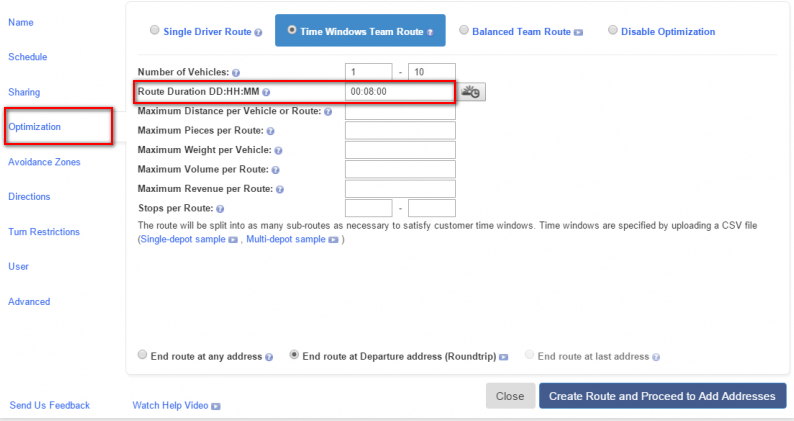
All you need to do is go to the schedule section in the route editor, as shown below.
- Click on the “Optimization” option in the route editor.
- Set the route duration.
Route4Me allows you to adjust for other factors as well.
Driving during sunrise and sunset is challenging – the light gets in your drivers’s eyes, which can cause them to slow down or get into an accident.
Route4Me’s planning and routing software comes with a sunrise and sunset feature. Just enter the area’s zip code, and you’ll get an optimized route that ensures your drivers don’t drive during sunrise or sunset.
You can access this feature in the same route duration option.
Real-Time Tracking
A lot of things can get in the way of your driver showing up on time. Bad weather and heavy traffic certainly slow your drivers down, and there’s always the possibility that some of your drivers are making personal stops on company time.
RELATED: Why You Should Track Your Drivers and How a Mobile Enabled Route Optimization Software Can Help
So it’s just about impossible to give your customers accurate ETAs when you plan routes with pen and paper. There are just too many moving parts involved with this task to do it yourself.
With Route4Me, you can track your drivers in real time. That means you’ll see delays as they happen, and you’ll be able to keep your customers happy by notifying them immediately should something unexpected happen.
Here’s how you can access the feature:
Tracking Individual Drivers
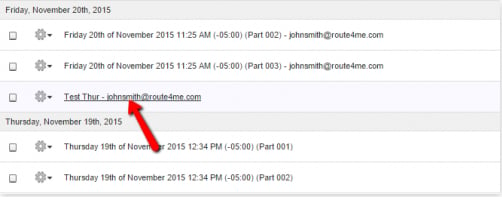
- Open the route you want to track from your route list
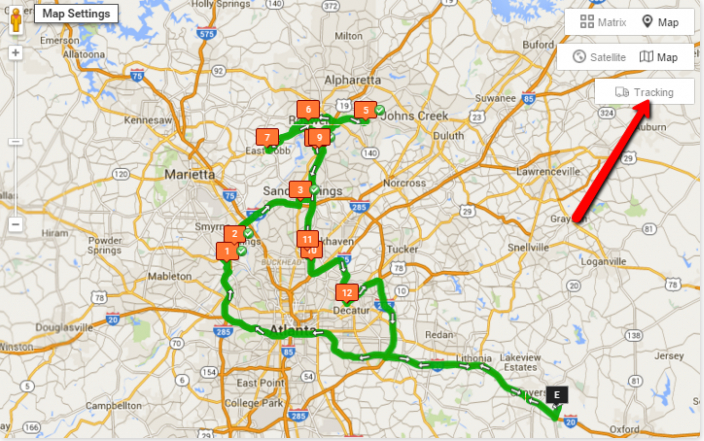
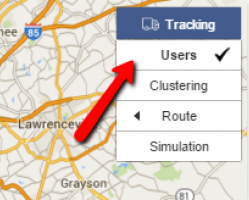
- Select “Tracking” in the top-right corner of the map, then select “Users”
- You’ll see the current location of your driver on the map as a pin with a truck icon
If you want to know more about the driver, just roll your mouse over the icon. That’ll show you the following info about the driver:
- Name
- Email address
- Current latitude and longitude coordinates
- Their current traveling speed
Tracking Multiple Drivers:
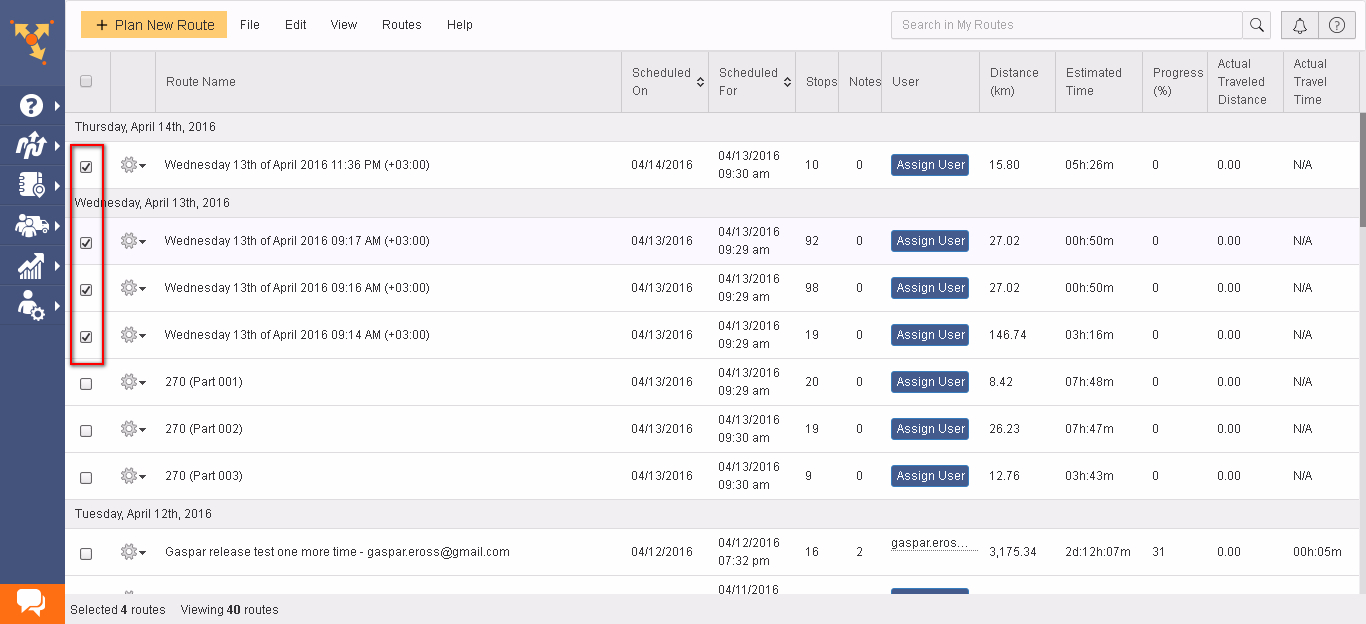
- Select the specific routes you want to track from the route list.
- Click on “Tracking” and select the users you want to review.
Tracking History
Route4Me’s vehicle route planning software doesn’t just show you what’s happening now – you can also review your tracking history.
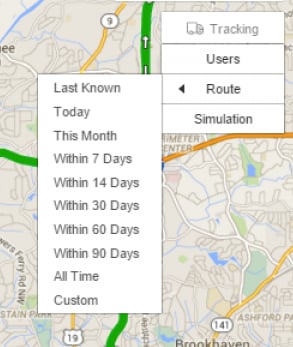
- Select “Tracking”
- Roll your cursor over “Route”, then select the period you want to review
Creating Specific Zones
Managing drivers is especially difficult when they’re scattered across a large area.
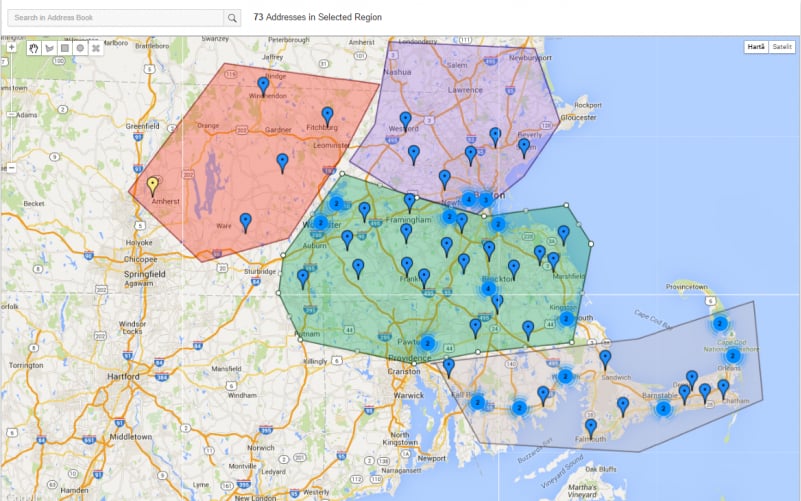
The most efficient way to serve your customers in this situation is to separate your drivers into different regions so that each driver’s set of stops is relatively close together.
Do you see where we’re going here? Creating zones like that with pen and paper would be really hard. But with Route4Me, it’s easy.
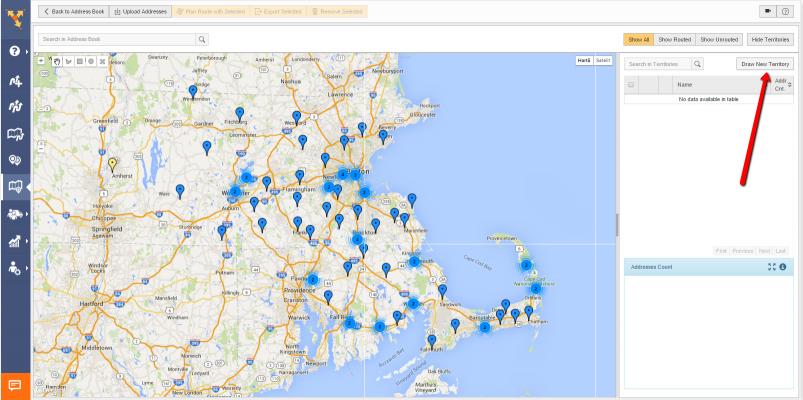
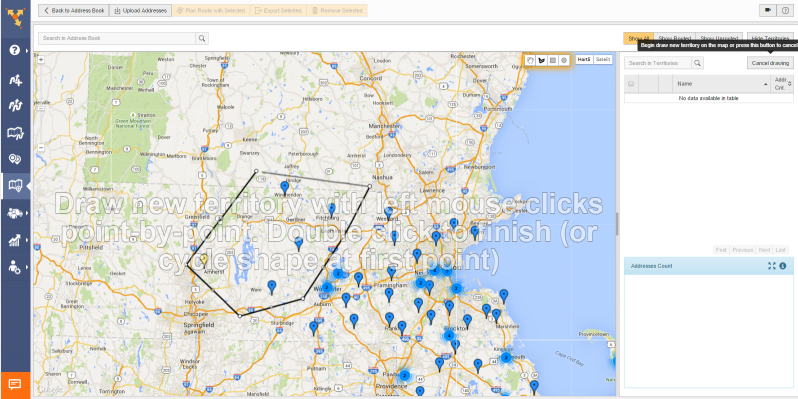
- Go to the “Address Book” map option in the left sidebar
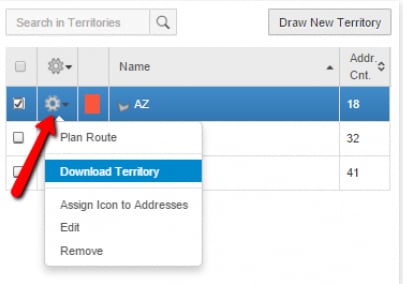
- Select “Draw New Territory”
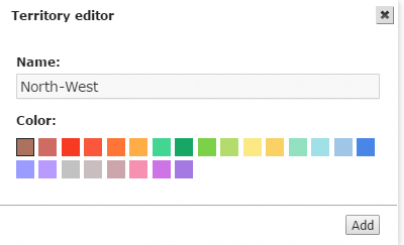
- Name the territory, choose a color for its display on the map, and select “Add”
- Click on the map to draw the territory borders. You can also draw territories point by point by left clicking on the map. To finish the territory selection, connect the border lines back to the starting point.
You can add an unlimited number of territories by repeating this process.
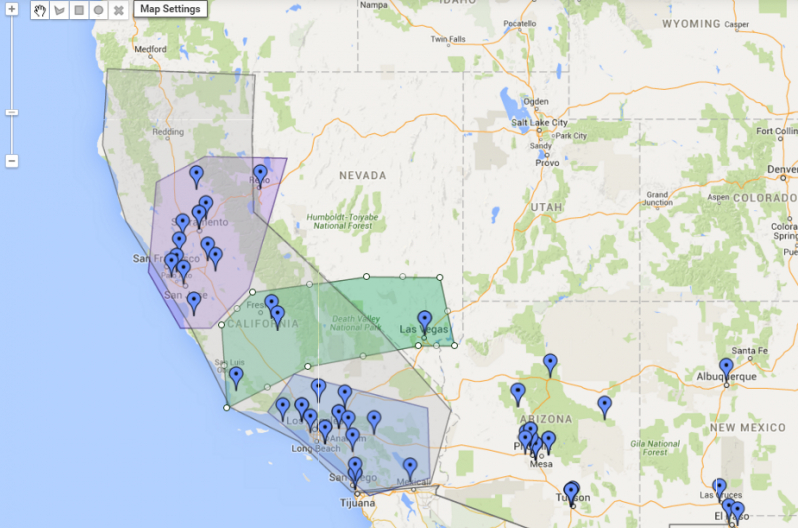
You can even draw overlapping territories.
And you can also hide or display a specific territory on the map. To do this, just uncheck or check the boxes next to each one.
To download the addresses as a CSV file, just click on the gear icon next to the territory and choose “Download Territory”.
If you want to remove a territory, then choose “Remove Territory”. Please note that the address book contacts within that territory will remain the same. Only the territory borders will be removed.
Reporting and Analytics
You need to know what you’re doing in order to know what you need to improve.
For example, you need to track your fuel costs each month to know if it’s a reasonable expense or something you need to cut down on.
Route4Me’s reporting and analytics feature allows you to keep track of fuel costs and all kinds of other information.
Dashboard
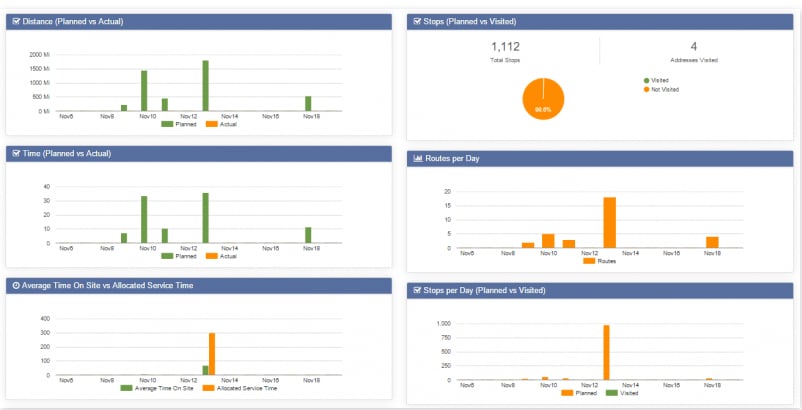
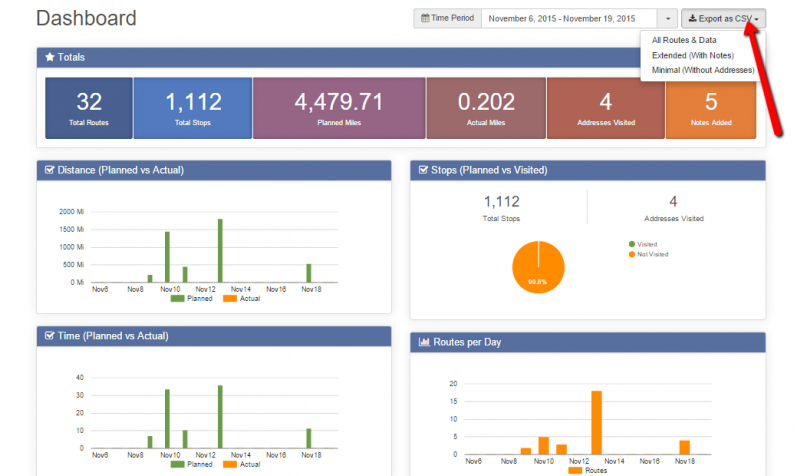
The Dashboard provides a visual summary of your routing details for a given period.
Here’s how to access this information:
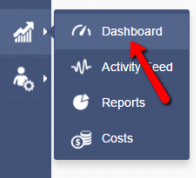
- Go to the “Analytics” tab and click on “Dashboard”.
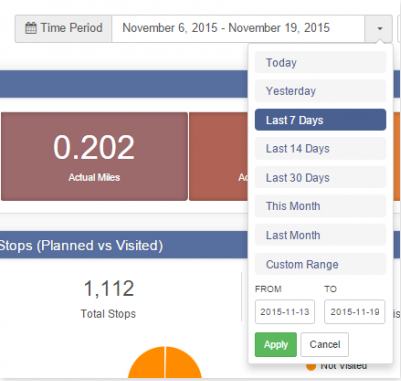
- Select the time period for which you want to see the details on
- You’ll see the “Totals” section that displays your key routing stats.
Below the “Totals” section, you’ll find detailed graphs for the following data:
- Distance (Planned vs. Actual)
- Stops (Planned vs. Visited)
- Time (Planned vs. Actual)
- Routes per Day
- Average Time On Site vs. Allocated Service Time
- Stops per Day (Planned vs. Visited)
- Notes per Day
Exporting Route Metrics
If you want to export your routing data, click on “Export as CSV” next to the “Time Period” field. Then select one of the following options:
- All Routes & Data – exports address information associated with the routes of that time period
- Extended (With Notes) – exports address information associated with the routes of that time period, with notes
- Minimal (Without Addresses) – exports route names and metrics, without address data
Activity Feed
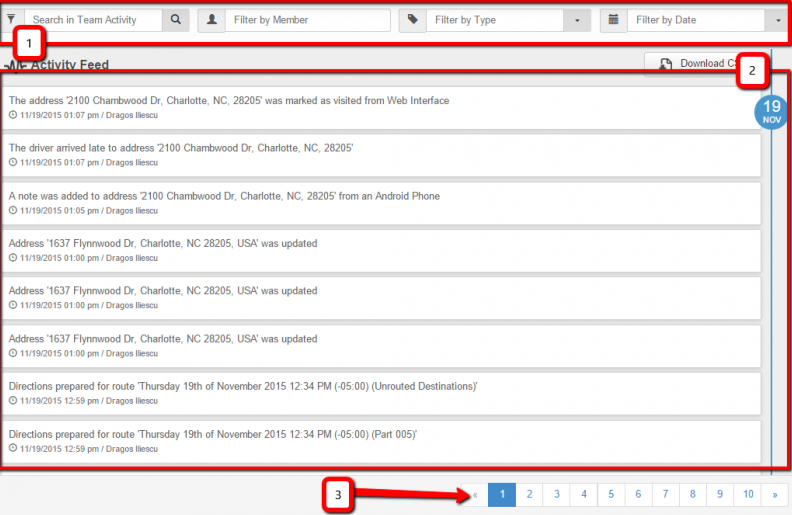
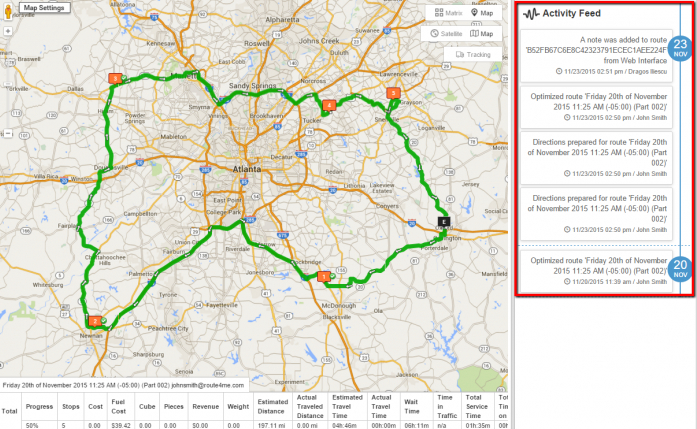
The activity feed displays all the activities in your account, including driver progress, note additions, and route modifications.
Want To See For Yourself How Route4Me Can Boost Your Profits?
Whether you want to slash the time it takes you to plan routes for your drivers, increase the number of stops they can make, or keep your customers satisfied knowing that your drivers show up on time… Route4Me helps you achieve that!
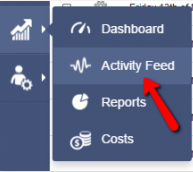
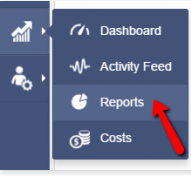
The button for this feature is located right under the “Dashboard” section.
The activity feed consists of three sections:
- Filtering and search options
- Latest activities in chronological order
- Navigation options between multiple activity feed pages
You can also use the search bar to find specific information within the activity feed.
And you can filter your search by:
- Member (shows the activity feed for a specific user)
- Type (shows the results for one of the predefined activity types)
- Date (shows the results for a predefined period)
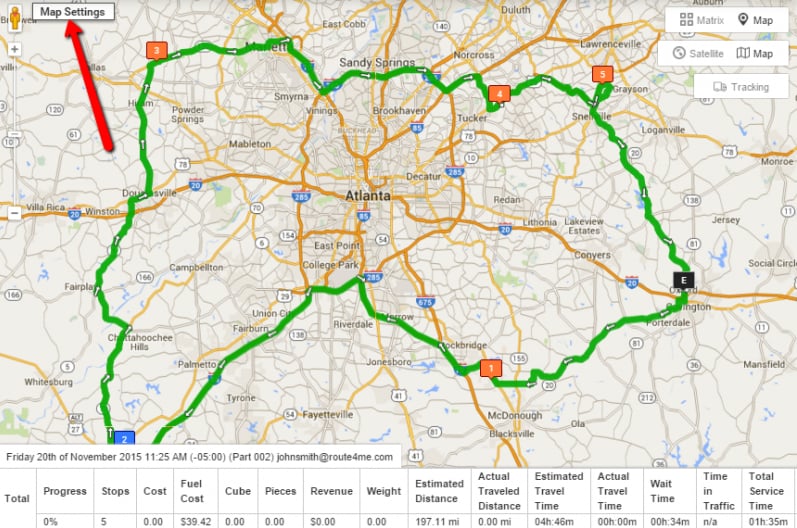
To view the activity feed for a route in the route editor, open the route in your “Saved Routes” list, and then click the “Map Settings” button and the “Activity Feed” checkbox.
You’ll then see the activity feed for the route on the right of the route map.
Reports
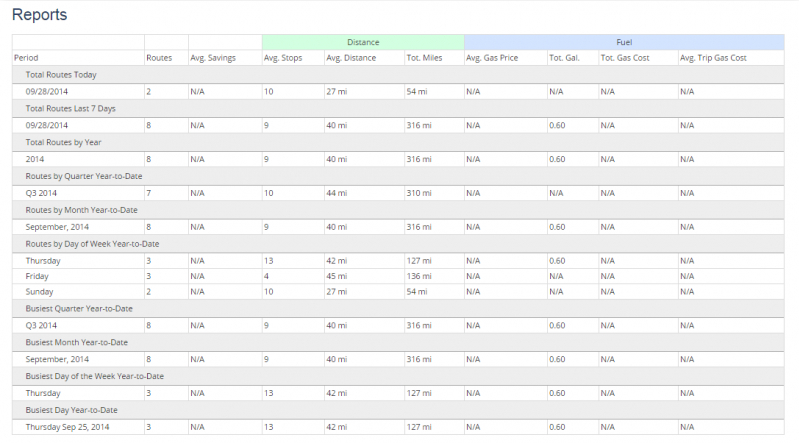
You can access the “Reports” section under the “Activity Feed” section. It provides detailed data about your routes, which can reveal ways to increase your efficiency. It updates automatically every time you change an existing route or make a new one.
Here’s how it looks:
Costs
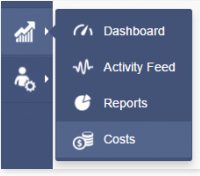
You can find the “Costs” section under the “Reports” section.
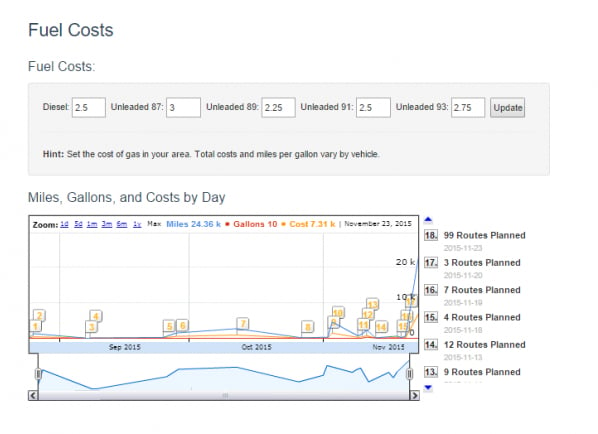
Here, you can set the fuel costs for the type of gas in a specific area to help keep track of your expenses. You can also use the timeline tool to view and analyze your fuel expenses for selected routes over a given period.
Stage 3
Geofencing
It’s nice to have the ability to keep track of your drivers, but no one has the time to keep their eyes on the screen 24/7 and follow every move they make.
That’s why Route4Me’s vehicle route planning software is integrated with geofencing technology.
It enables you to create virtual fencing around vehicle storage facilities. For example, you can fence off a driver’s parking lot or home. Whenever that driver leaves a geofence perimeter you’ve set, you’ll immediately be notified.
You can also create virtual fencing around customer locations so that you know instantly when your driver makes their stops.
Geofences are triggered automatically inside the Route4Me vehicle route planning software – you don’t need to enable or disable it inside the tool to make it work for you.
However, you can choose whether they show up on the route map or not.
Here’s how to set up geofences in Route4Me’s vehicle route planning software:
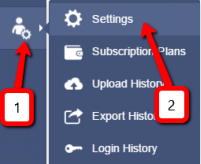
- Click on “My Account” in the last section of the left sidebar; then select “Settings”
- Scroll down a bit and you’ll see the following geofence settings:
- Type – Select circle or square
- Size – Set the total size of the geofence area you want around each location
- Time on Site – Select how long the driver must spend in the area before it’s marked as visited
In the example below, the automatic visitation trigger will be enabled when:
- The driver enters a circular area of 50 m around the geocoded location
- The driver stays within the geofenced area for at least 120 seconds.
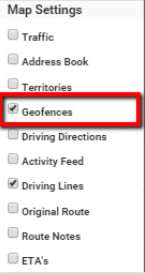
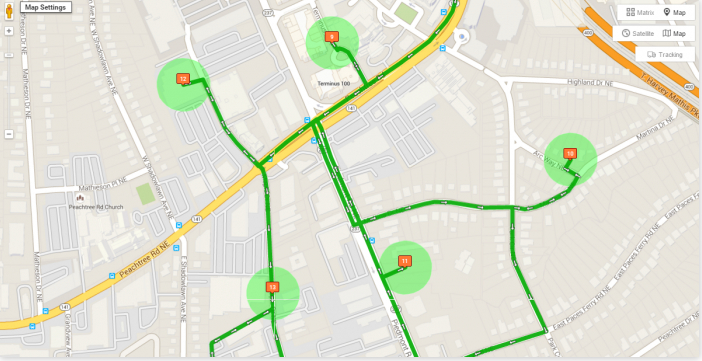
If you want to view your geofences on a map, go to “View Saved Routes”. Open the route you’re interested in by clicking on its name, then click on the map setting and check the “Geofences” box.
You’ll then see the geofenced areas on the map.
Locate Untapped Areas
Growing your business is all about finding opportunities. You’d like to expand as much as possible, but every expansion requires an investment in new infrastructure. If the expansion doesn’t work out as planned, then you’ve wasted a lot of money on infrastructure you don’t even need.
Where do you have the opportunity to successfully expand?
Route4Me will show you where. With our interactive map screen feature, you can see where you’re doing business, where you’re not, and how much it will cost to expand into new areas. This’ll help you grow your business and make more money without biting off more than you can chew.
Avoid Left Turns
Did you know that UPS saves millions of hours every year?
How does UPS route its trucks?
By simply avoiding left turns. Taking a left turn means your drivers have to wait longer in traffic. In addition to being a waste of time, this is also a waste of fuel, and it puts your drivers at a greater risk of getting into an accident.
When it comes to left turns, take the Nancy Reagan approach and “Just Say No.”
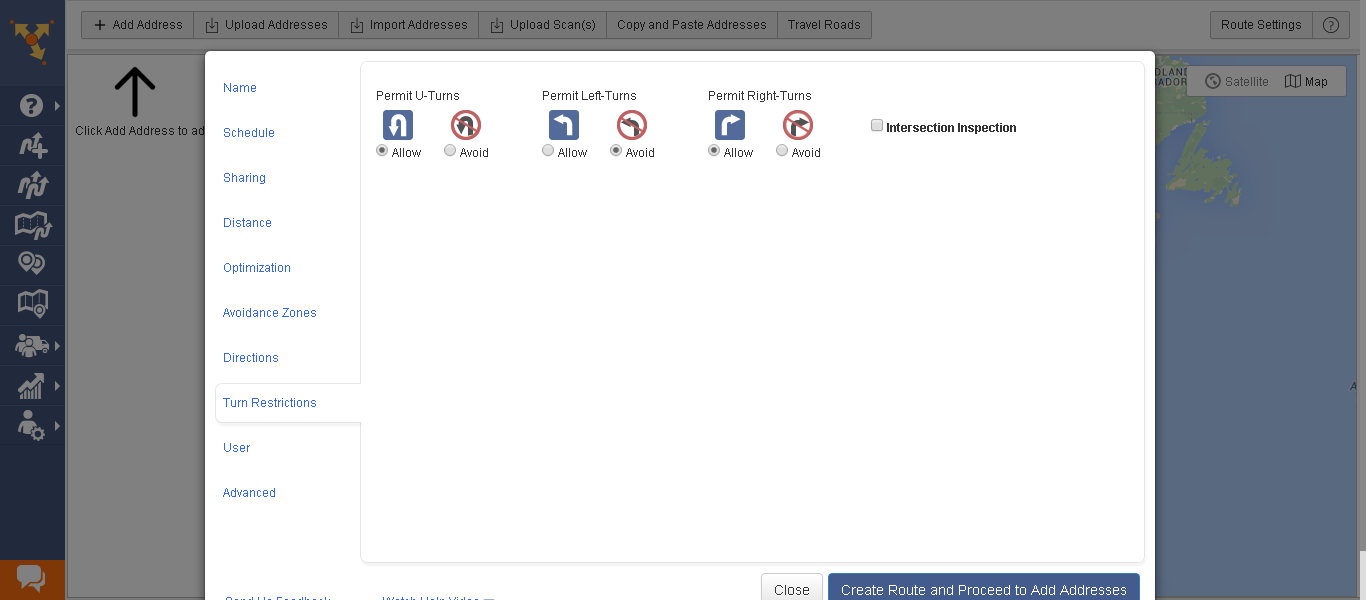
Route4Me comes with an “Avoid Left Turn” feature. To turn it on, select “Turn Restrictions” and then select “Avoid” in the “Permit Left Turns” section. It’s that easy.
Stage 4
We also have advanced features designed specifically for the needs of enterprises that serve a large area and have a lot of vehicles. These features include:
- Automatic route eliminator
- More constraints, such as weight, load, and distance
- Real-time dynamic ETAs
- Continuous route balancing
- Interactive team congregation
- Dial-a-ride
- Com integration
- API access
- Dedicated planning terminal
- Custom algorithm development
- Lock-last stop
- Mobile address book sync
So, which stages do you need? Let us know in the comments section below.
Want To See For Yourself How Route4Me Can Boost Your Profits?
Whether you want to slash the time it takes you to plan routes for your drivers, increase the number of stops they can make, or keep your customers satisfied knowing that your drivers show up on time… Route4Me helps you achieve that!

