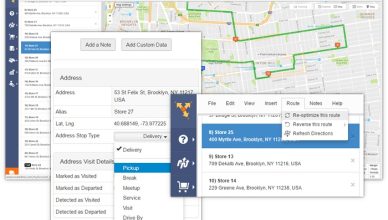
Route4Me’s Address Book is a centralized database of all the contacts and addresses that are stored on your Route4Me account. It allows you to quickly create accurate and efficient routes.
Once you add a contact to your Address Book, you can share it with others, insert it into existing routes, and use it to plan a new route. You can generate orders from your Address Book as well.
Now, Route4Me has released a new Android app feature that allows you to add addresses directly from the interactive map to your Address Book. Just tap and hold on any spot on the map to add it to your Address Book as a contact.
This feature saves you from all the time and effort it would take to format and import spreadsheets or add contacts manually. Another benefit is that it helps you attain a visual understanding of your routes and the locations of your customers. Also, every contact you add to your Address Book from the map will be instantly synchronized across all the associated computers and mobile devices.
Let’s take a closer look at how this feature works…
How to Use the Interactive Map to Add Contacts to Your Route4Me Address Book
- Go to “Address Book” from the navigation menu.
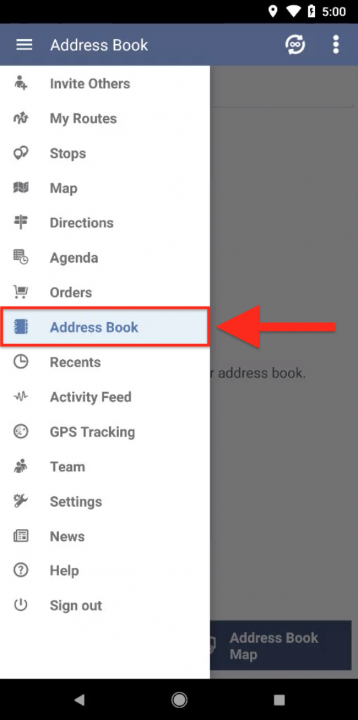
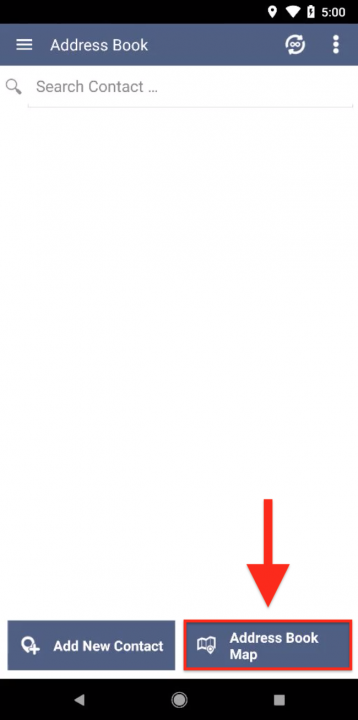
2. Tap on the “Address Book Map” button.
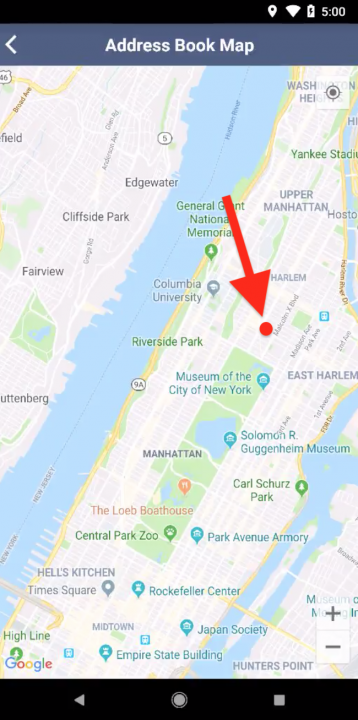
3. In the interactive map, tap and hold on any spot that you want to add to your Address Book as a contact. When you pick a spot on the map, the app will add the nearest valid address located next to the selected spot.
4. A confirmation window will open asking you to confirm the address. If it’s correct, select “OK”.
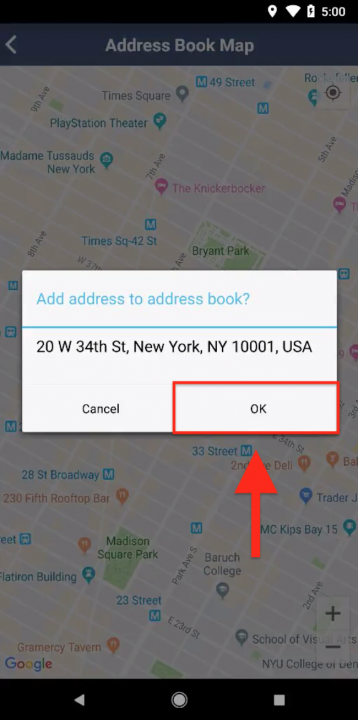
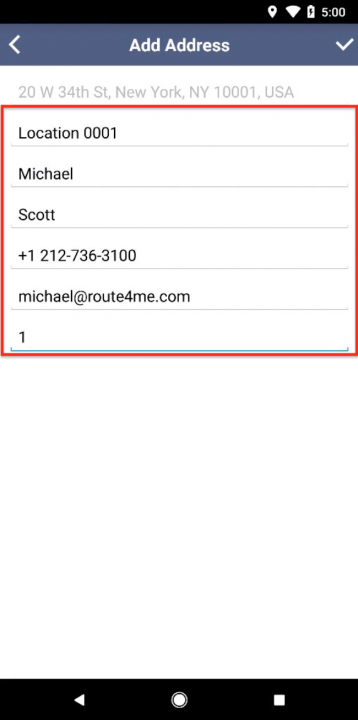
5. Fill out the corresponding fields with the contact information you want to associate with the address. To learn more about using Address Book Groups, visit this page.
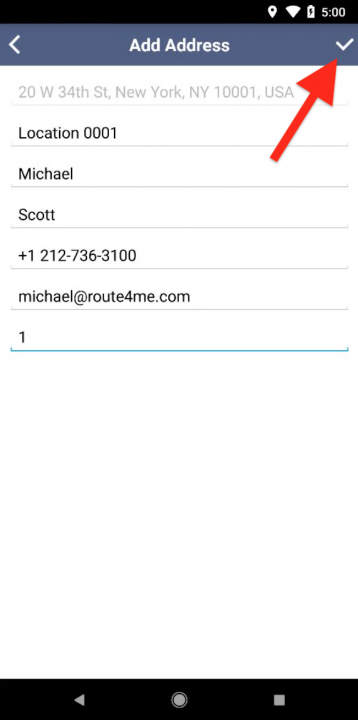
6. After filling out the contact information, tap on the Checkmark icon in the top-right corner of the screen to save the contact to your Address Book.
7. Once the address has been saved to your Address Book, you can view it on the Address Book Map.
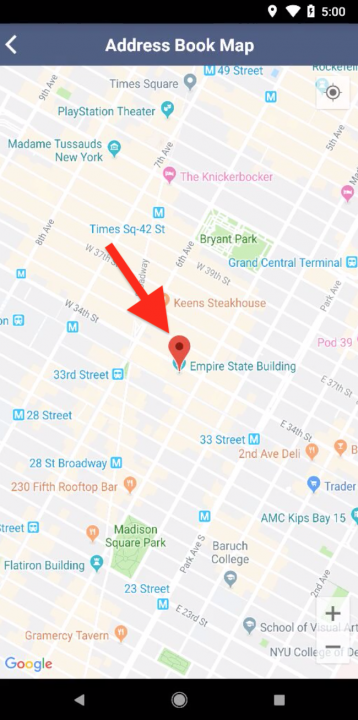
8. All contacts added from the interactive map can be found in your Address Book, where you can manage them, modify them, and use them for planning routes.
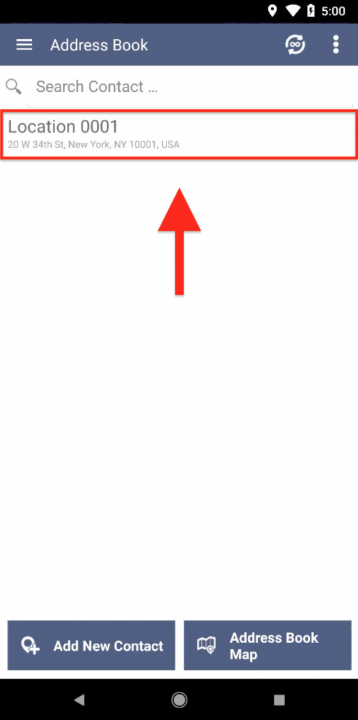
How to Use the Interactive Map to Plan Routes on Your Android Device
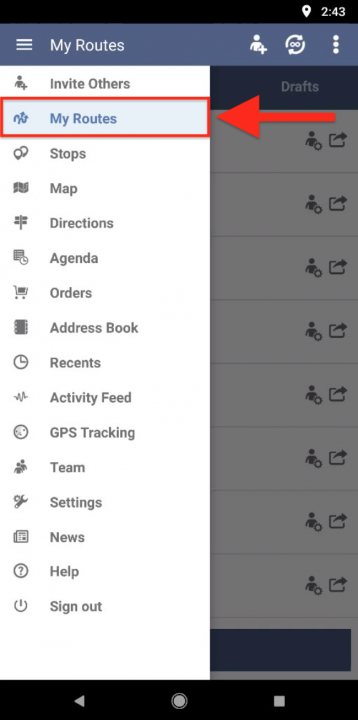
- Go to “My Routes” from the navigation menu.
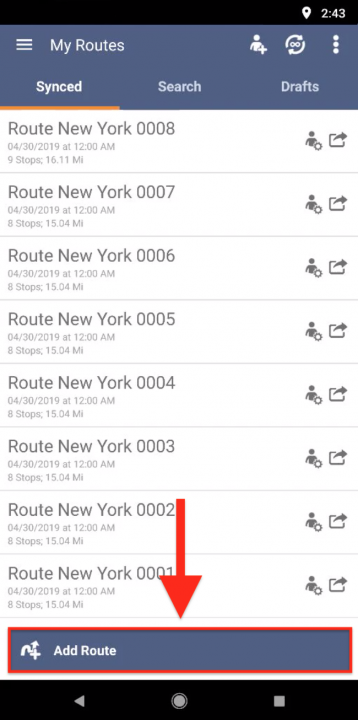
2. Tap on the “Add Route” button.
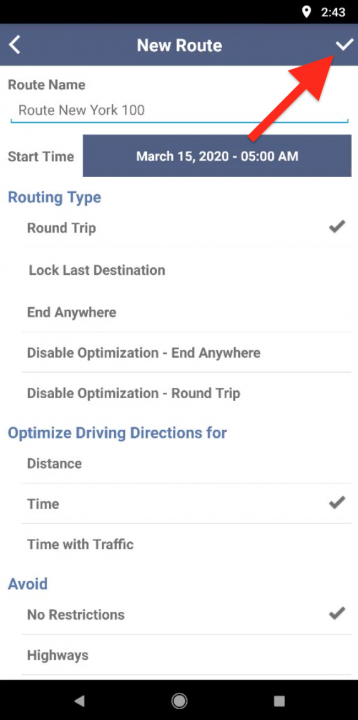
3. Specify the route settings and tap on the Checkmark icon in the top-right corner of the screen to proceed.
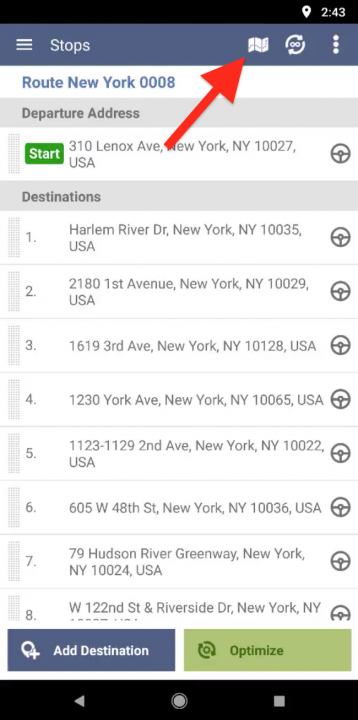
4. Tap on the Map icon in the top-right corner of the route’s “Stops” screen.
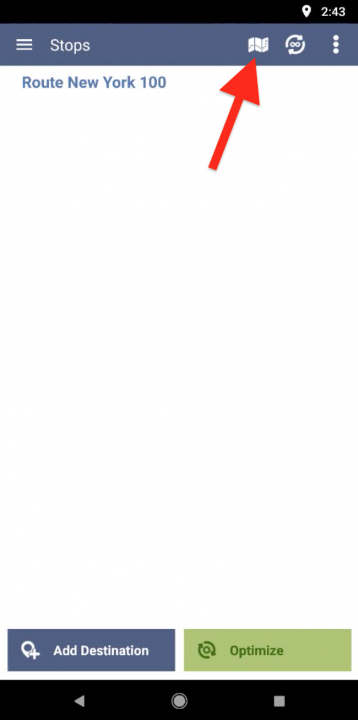
5. On the interactive map, tap and hold on any spot on the map that you want to add to the route as a stop. When you pick a spot on the map, the app adds the nearest valid address located next to the selected spot.
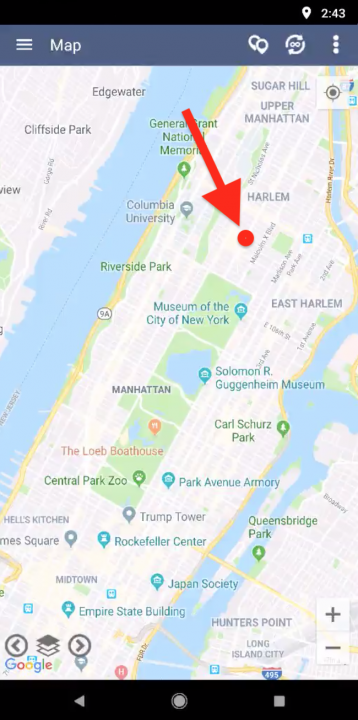
6. A confirmation window will open asking you to confirm the address. If it’s correct, select “OK”.
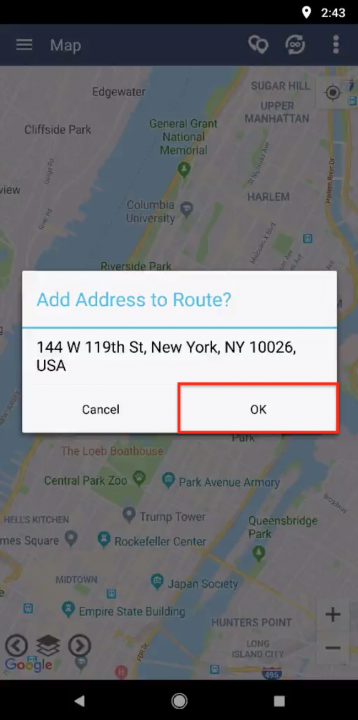
The first address added to the route is set as the route’s starting stop.
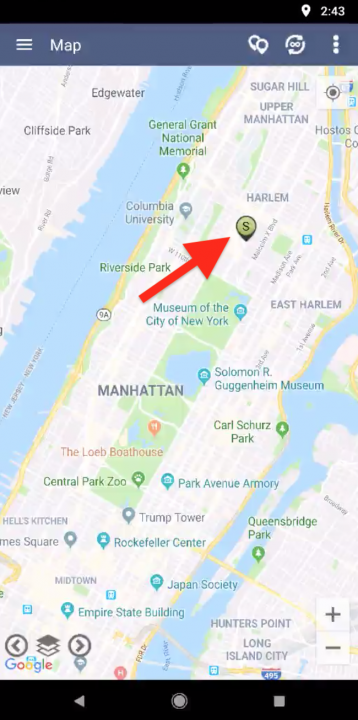
7. Repeat the above process to add more stops to the route. All addresses added by using the map are placed at the end of the route, one after another.
8. To optimize the route so that the order of stops is in the most efficient sequence, tap on the Stops icon in the top-right corner of the screen, and then tap on the “Optimize” button. To learn more about optimizing your routes using the Route4Me Android app, visit this page.
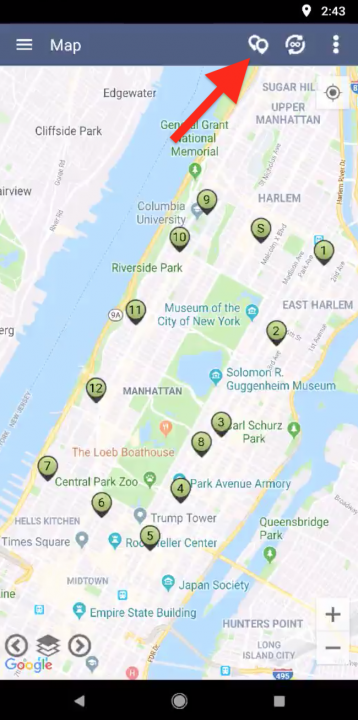
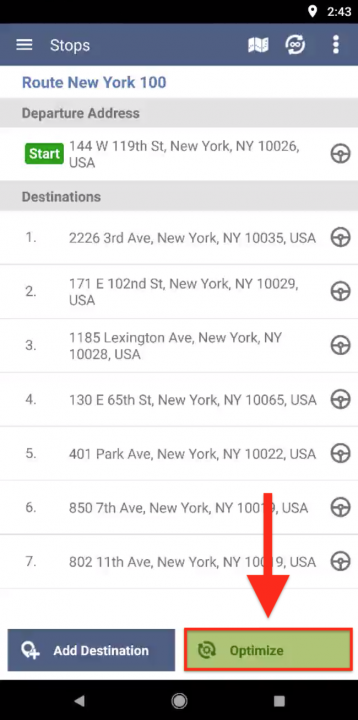
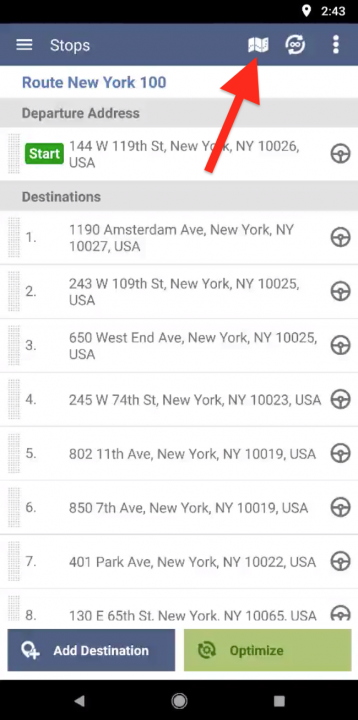
9. After optimizing the route, tap on the Map icon in the top-right corner of the screen to return to the map.
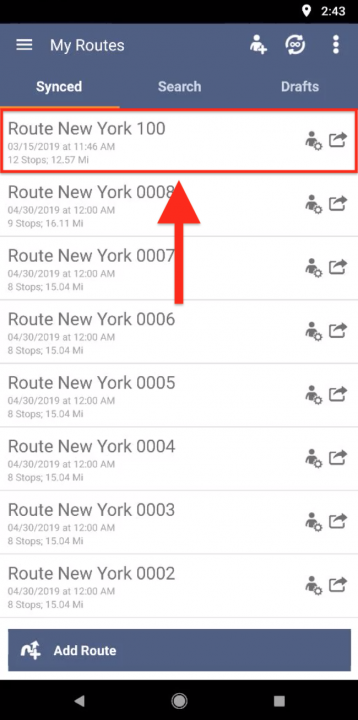
10. All routes planned using the map are also added to your Routes List, where you can manage them, modify them, and use them for real-time navigation.
How to Use the Interactive Map to Insert Stops into Routes on Your Android Device
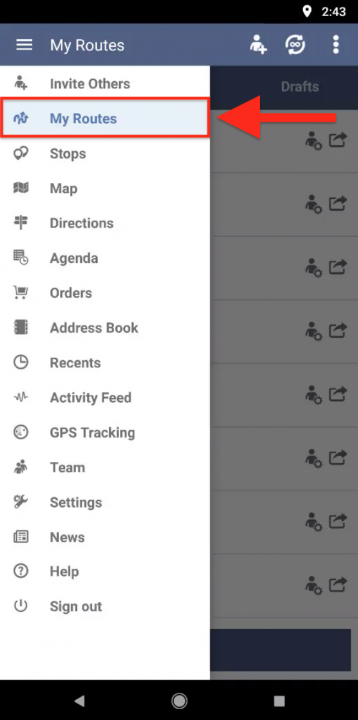
- Go to “My Routes” from the navigation menu.
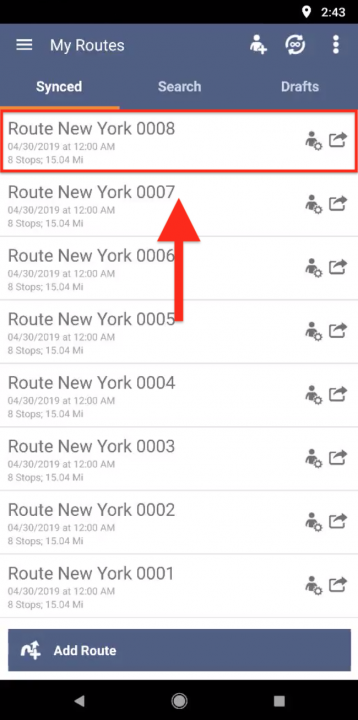
2. Open the route you want to add stops to.
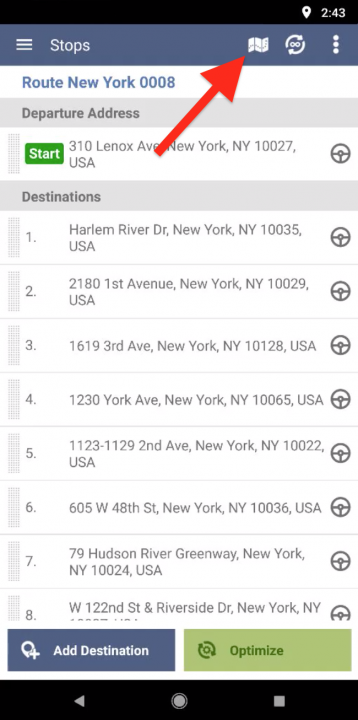
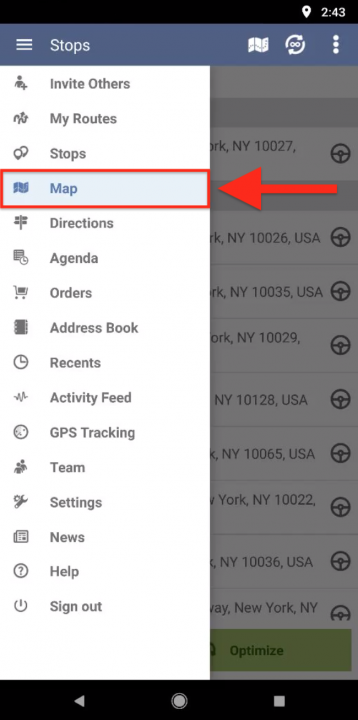
3. Tap on the Map icon in the top-right corner of the screen. Alternatively, after opening the route, select “Map” in the navigation menu.
4. On the interactive map, tap and hold on any spot on the map that you want to add to the route as a stop. When you pick a spot on the map, the app adds the nearest valid address located next to the selected spot.
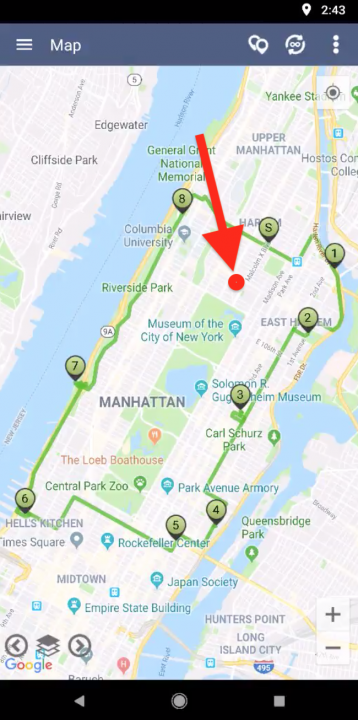
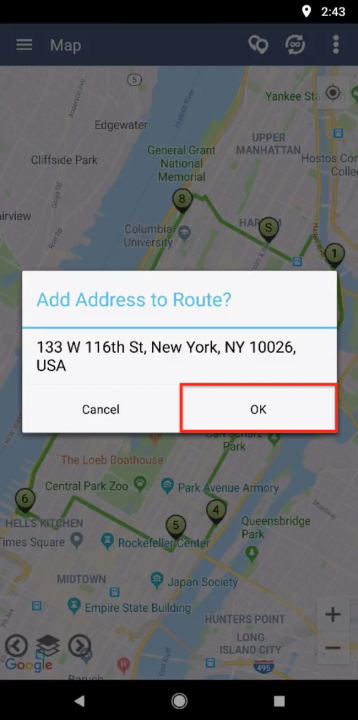
5. A confirmation window will open asking you to confirm the address. If it’s correct, select “OK”.
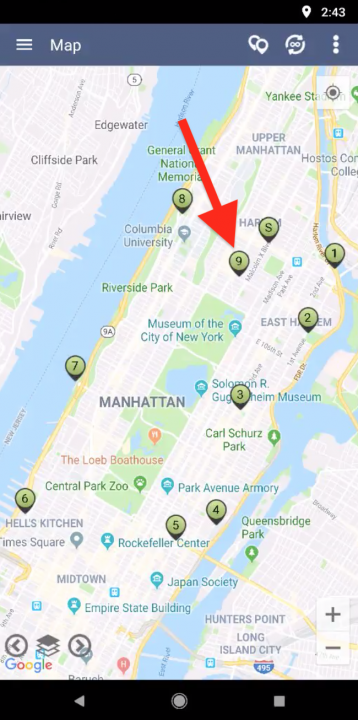
6. Repeat the above process to add more stops to the route. All addresses added using the map are placed at the end of the route, one after another. Once you have added one or more addresses, the route should be re-optimized to improve efficiency.
7. To re-optimize the route, tap on the Stops icon in the top-right corner of the screen, and then tap on the “Optimize” button. To learn more about optimizing your routes using the Route4Me Android app, visit this page.
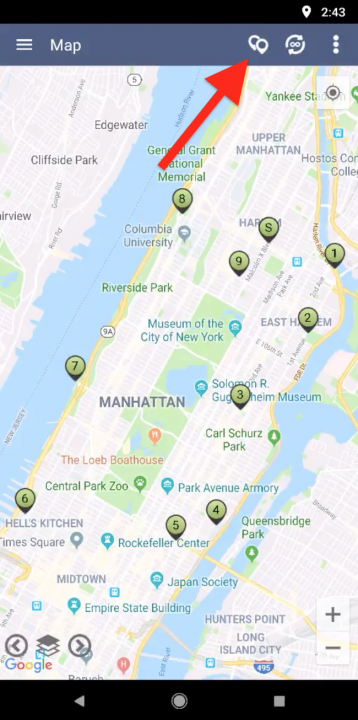
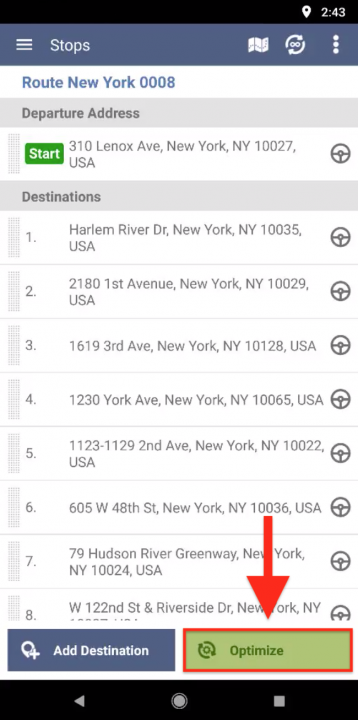
8. After re-optimizing the route, tap on the Map icon in the top-right corner of the screen to return to the map.
Do you have any questions about using the Route4Me Address Book on an Android device? Feel free to let us know in the comments section below.
Want To See For Yourself How Route4Me Can Boost Your Profits?


