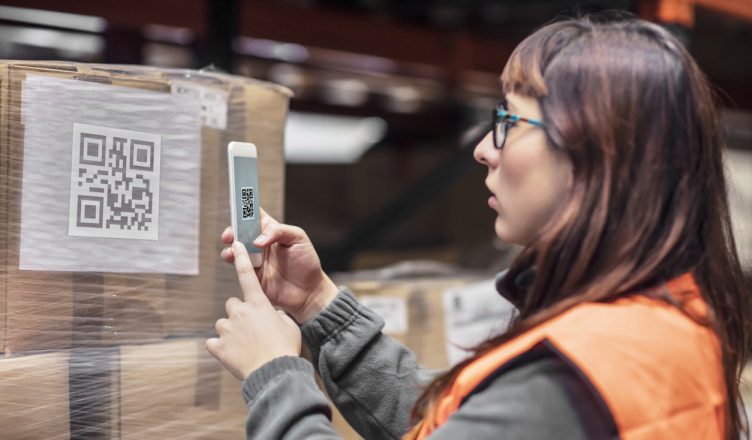
Printed tags are becoming passé and digital labels are being embraced in retail, warehousing, logistics, and many other industries. However, for digital labels to fully go mainstream, it is important to have tools to scan the e-ink barcodes for capturing accurate data. This is where Route4Me can help.
Both Route4Me’s Android and iOS barcode scanners will help you scan any type of e-ink barcode easily on modern electronic labels to securely capture up-to-date and accurate data. This will assist your field reps significantly, reduce the time of data input, and decrease the chances of possible errors when they use the barcode scanner out in the field. It will also improve the efficiency of your field and routing operations.
But, how can Route4Me’s barcode scanner help you scan e-ink barcodes from digital labels and how can you view the captured barcode data? We discuss everything in this article. Read on.
How to Scan E-Ink Barcodes from Digital Labels
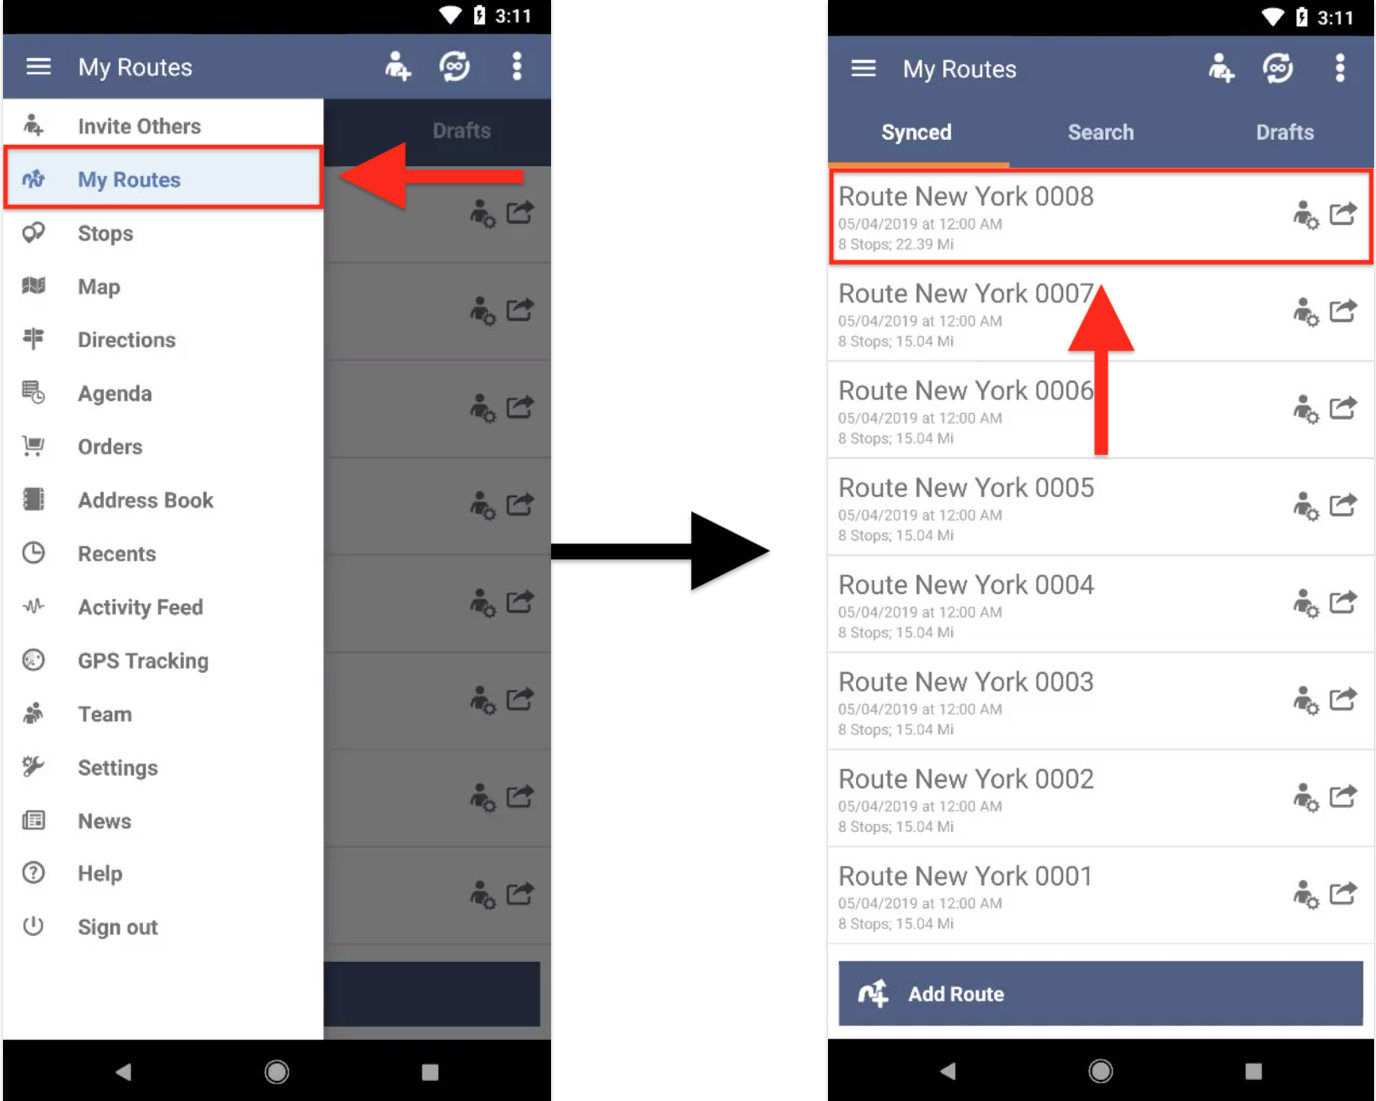
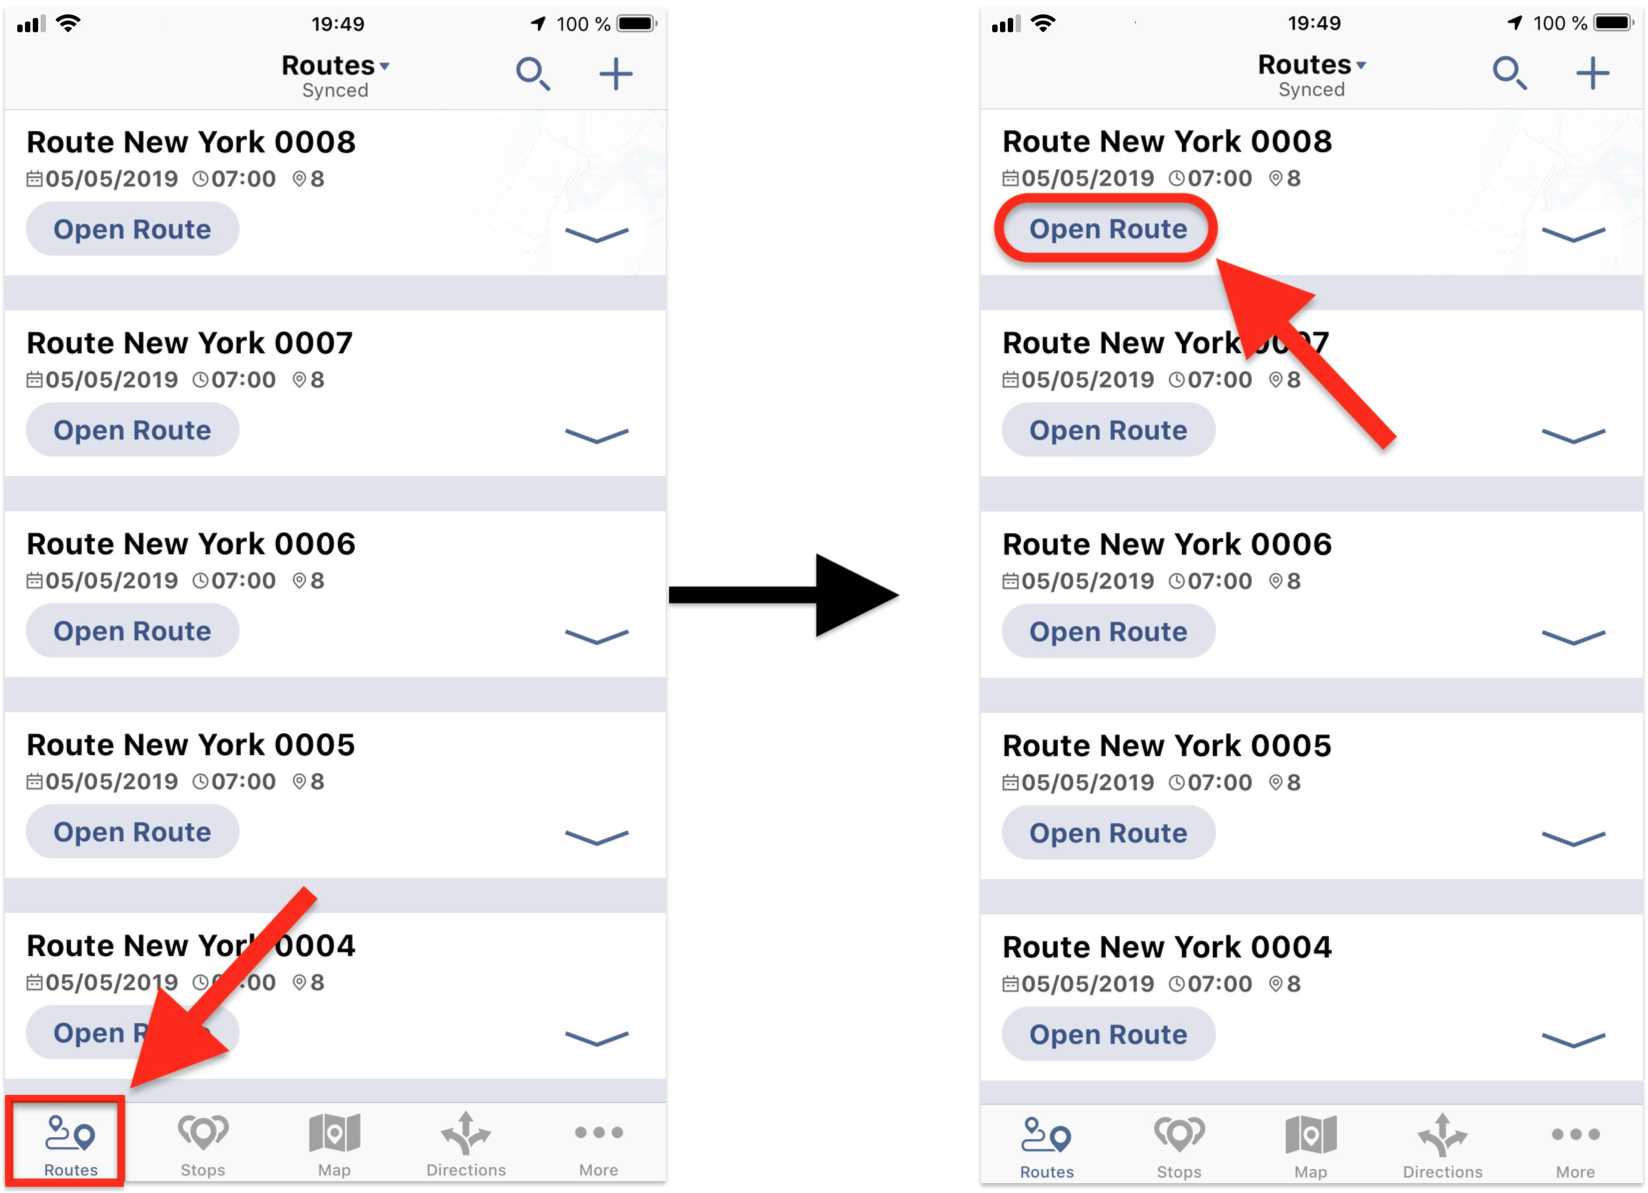
- Step 1: If you want to capture data from a digital label and add it to a stop, first go to “My Routes” from the navigation menu and then open the route that contains the stop to which you want to add the barcode data.
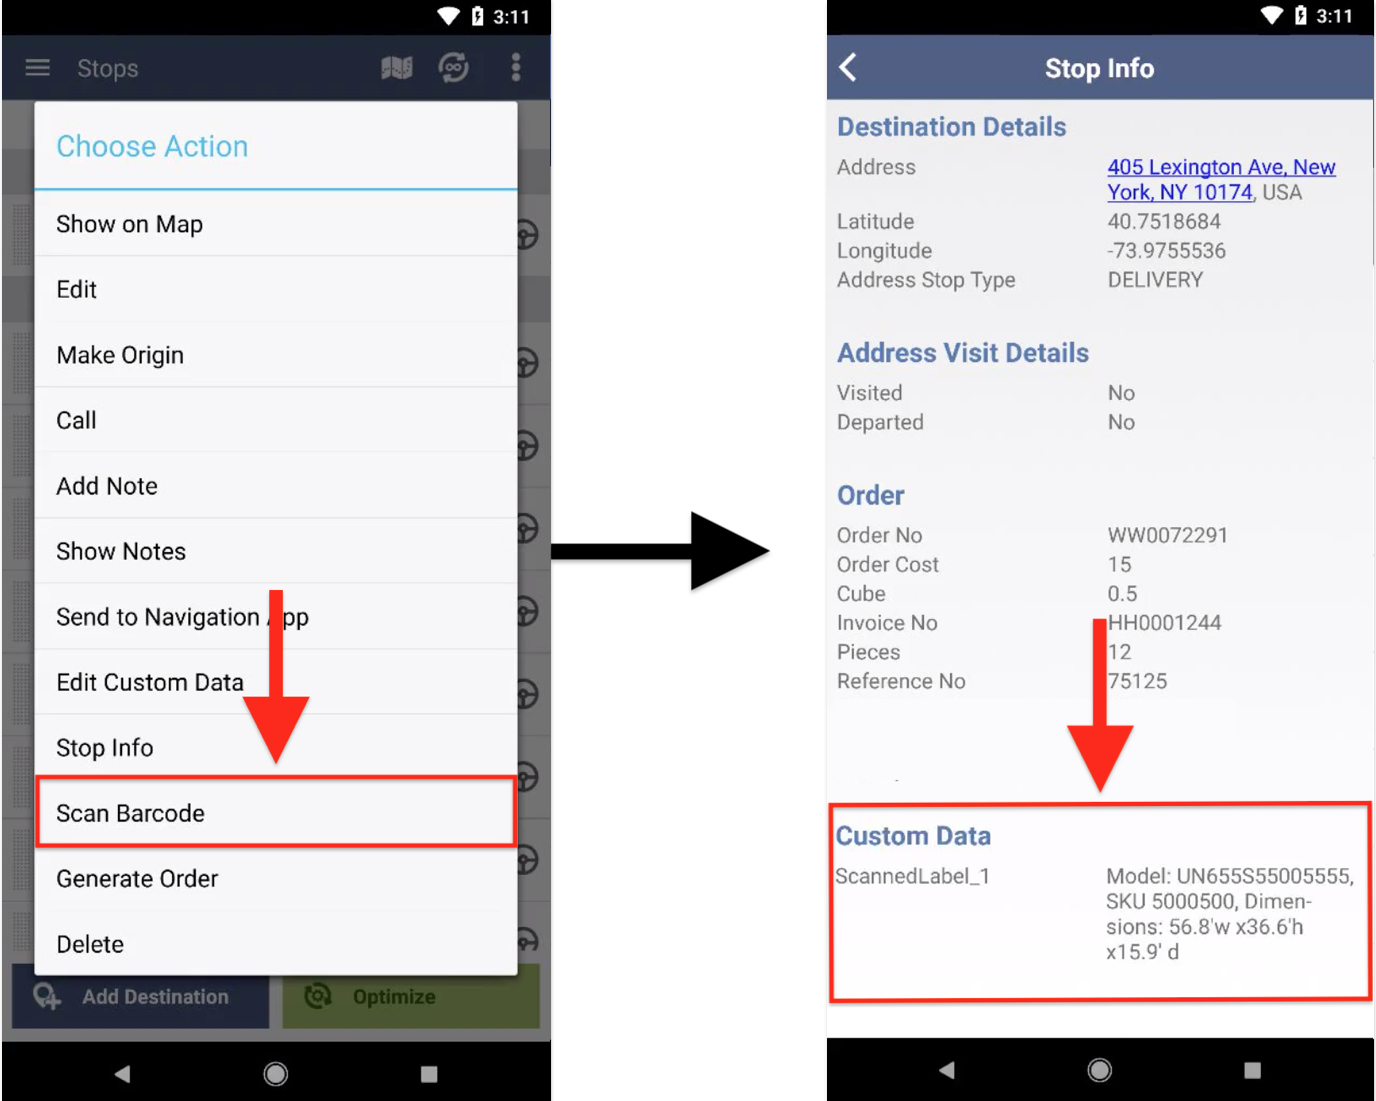
- Step 2: On the “Stops” screen of the opened route, tap on the stop for which you want to scan one or multiple barcodes. Thereafter, select “Scan Barcode” from the stop’s “Choose Action” menu, if you are using Android or from the stop’s menu if you are using iOS.
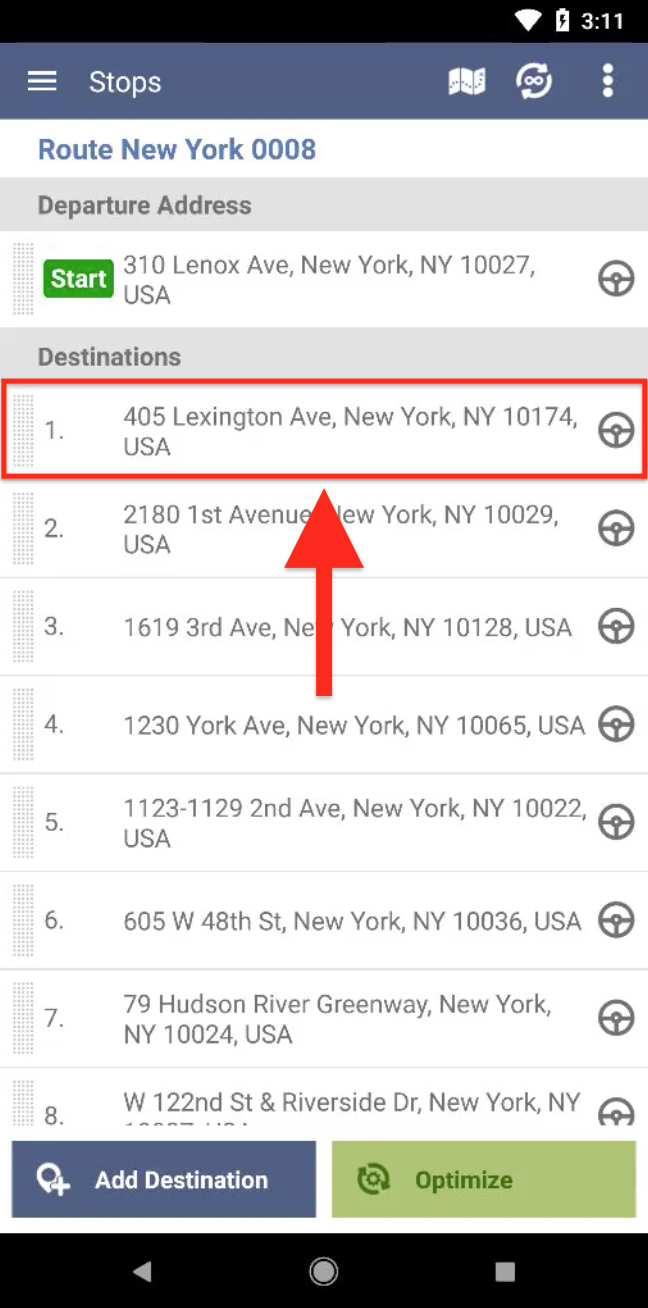
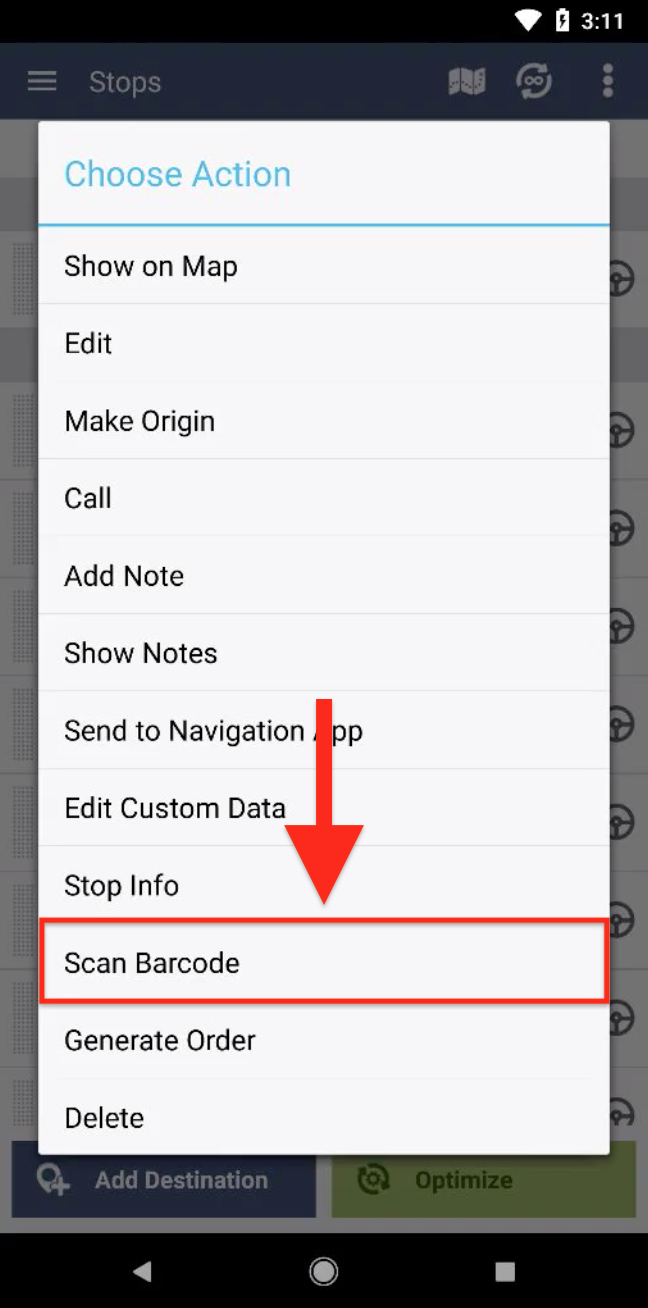
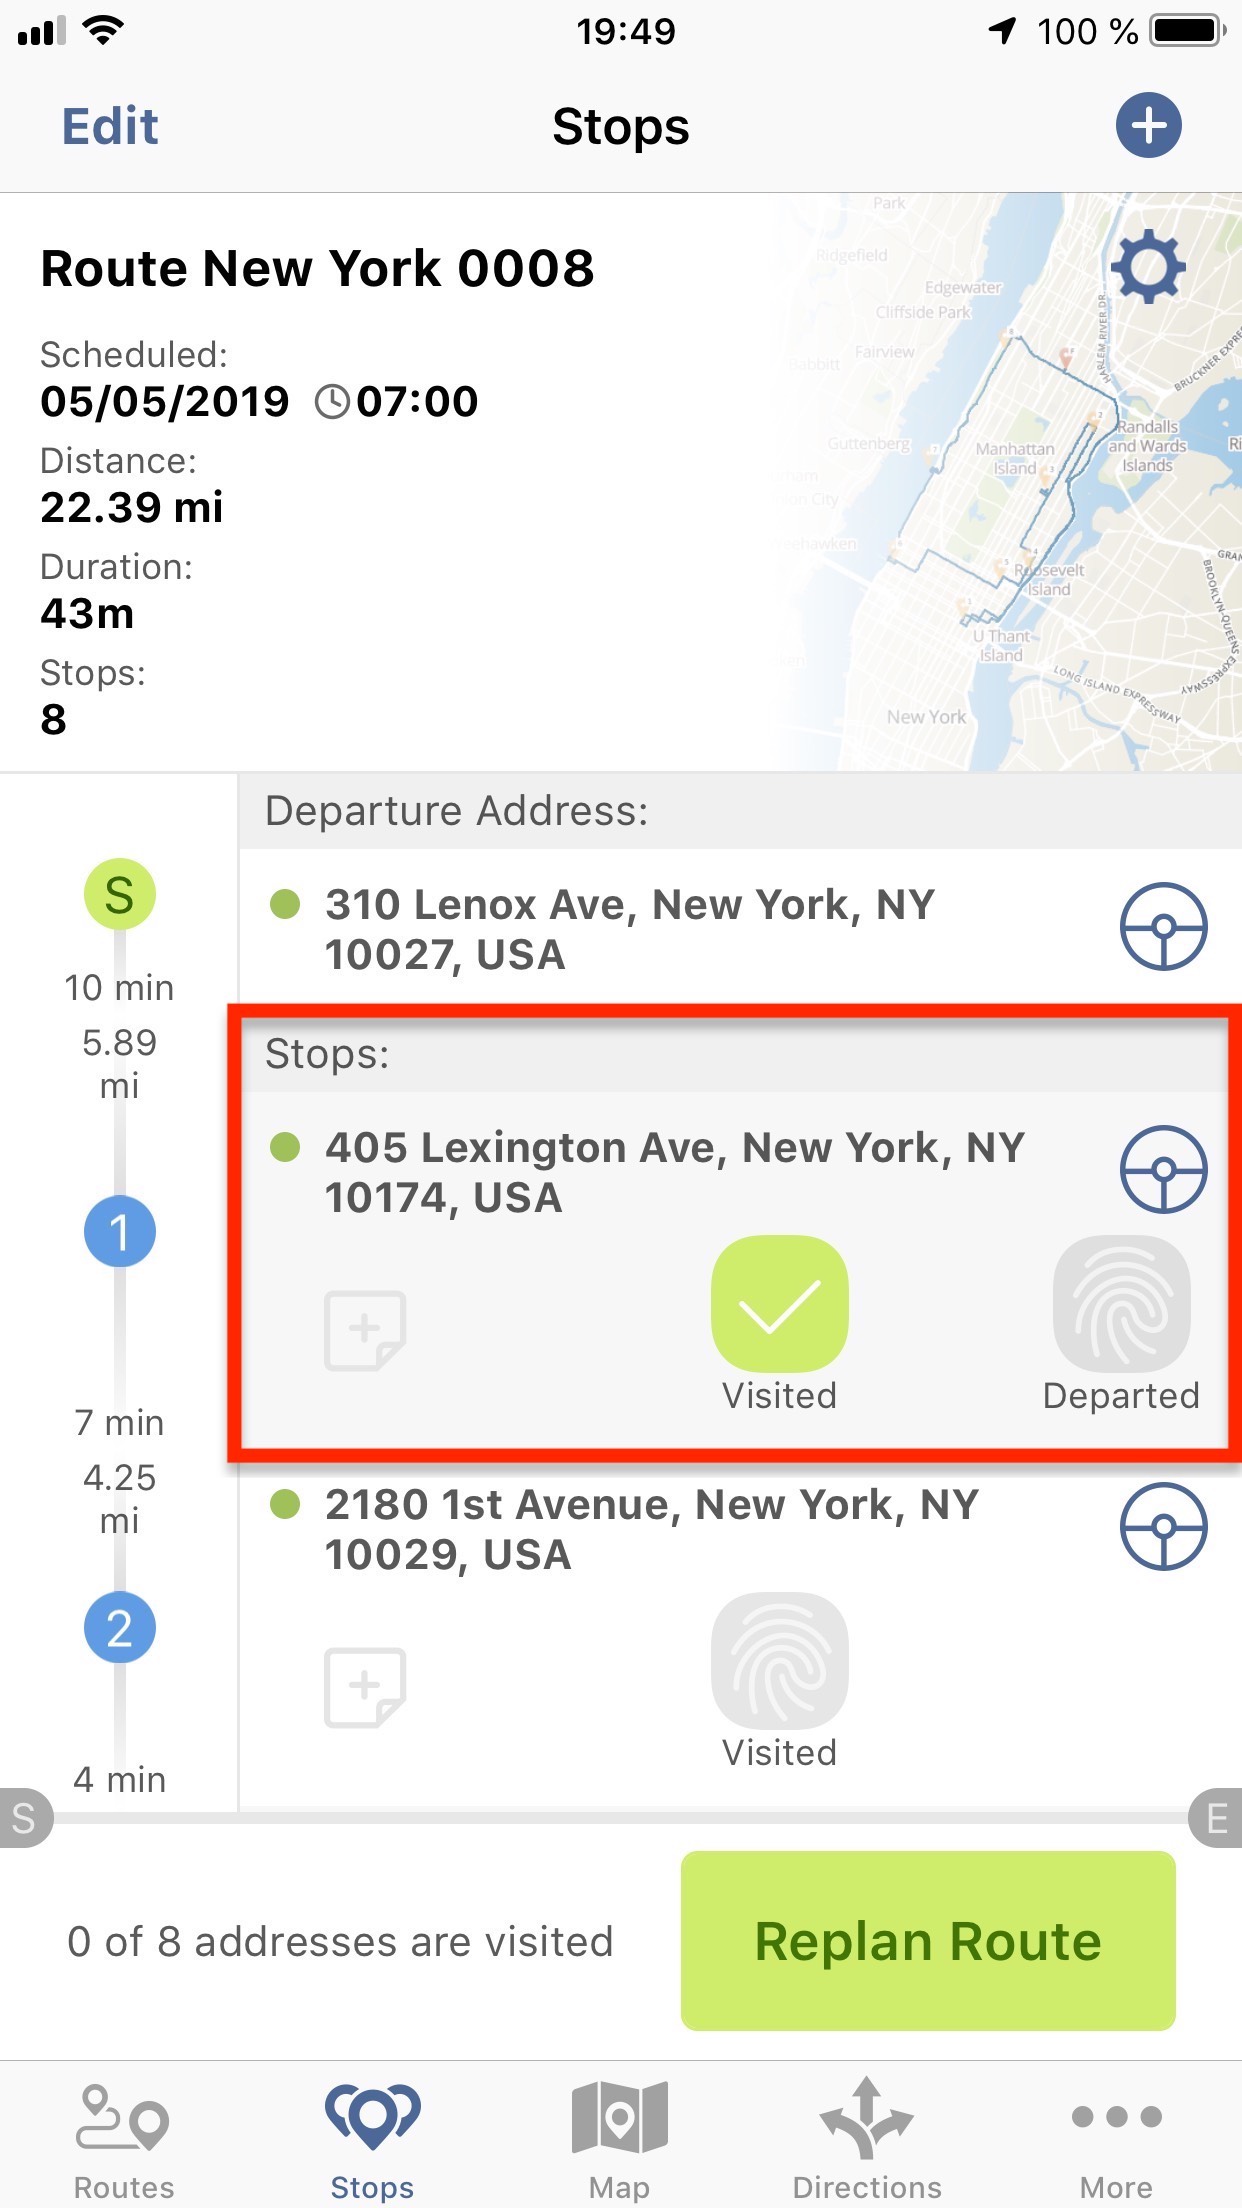

- Step 3: Point your device’s camera at the digital label until the app detects and scans the corresponding barcode. Make sure that the image is clear and sharp for faster and more accurate data capturing.
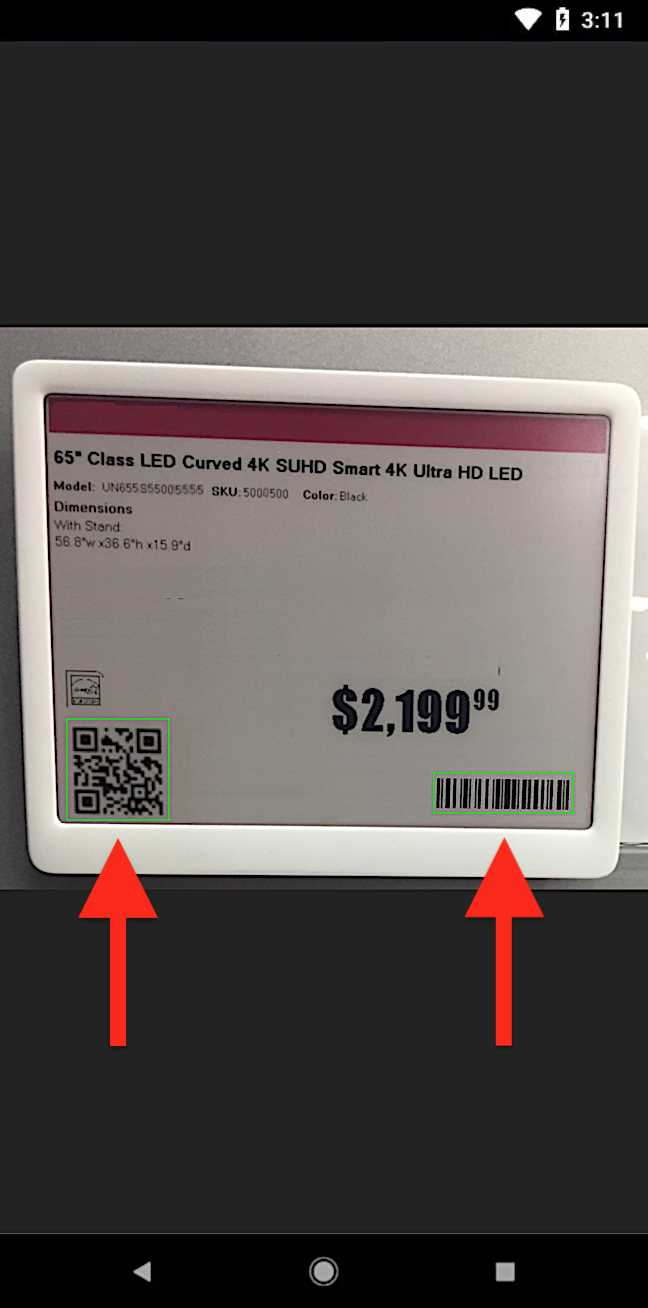
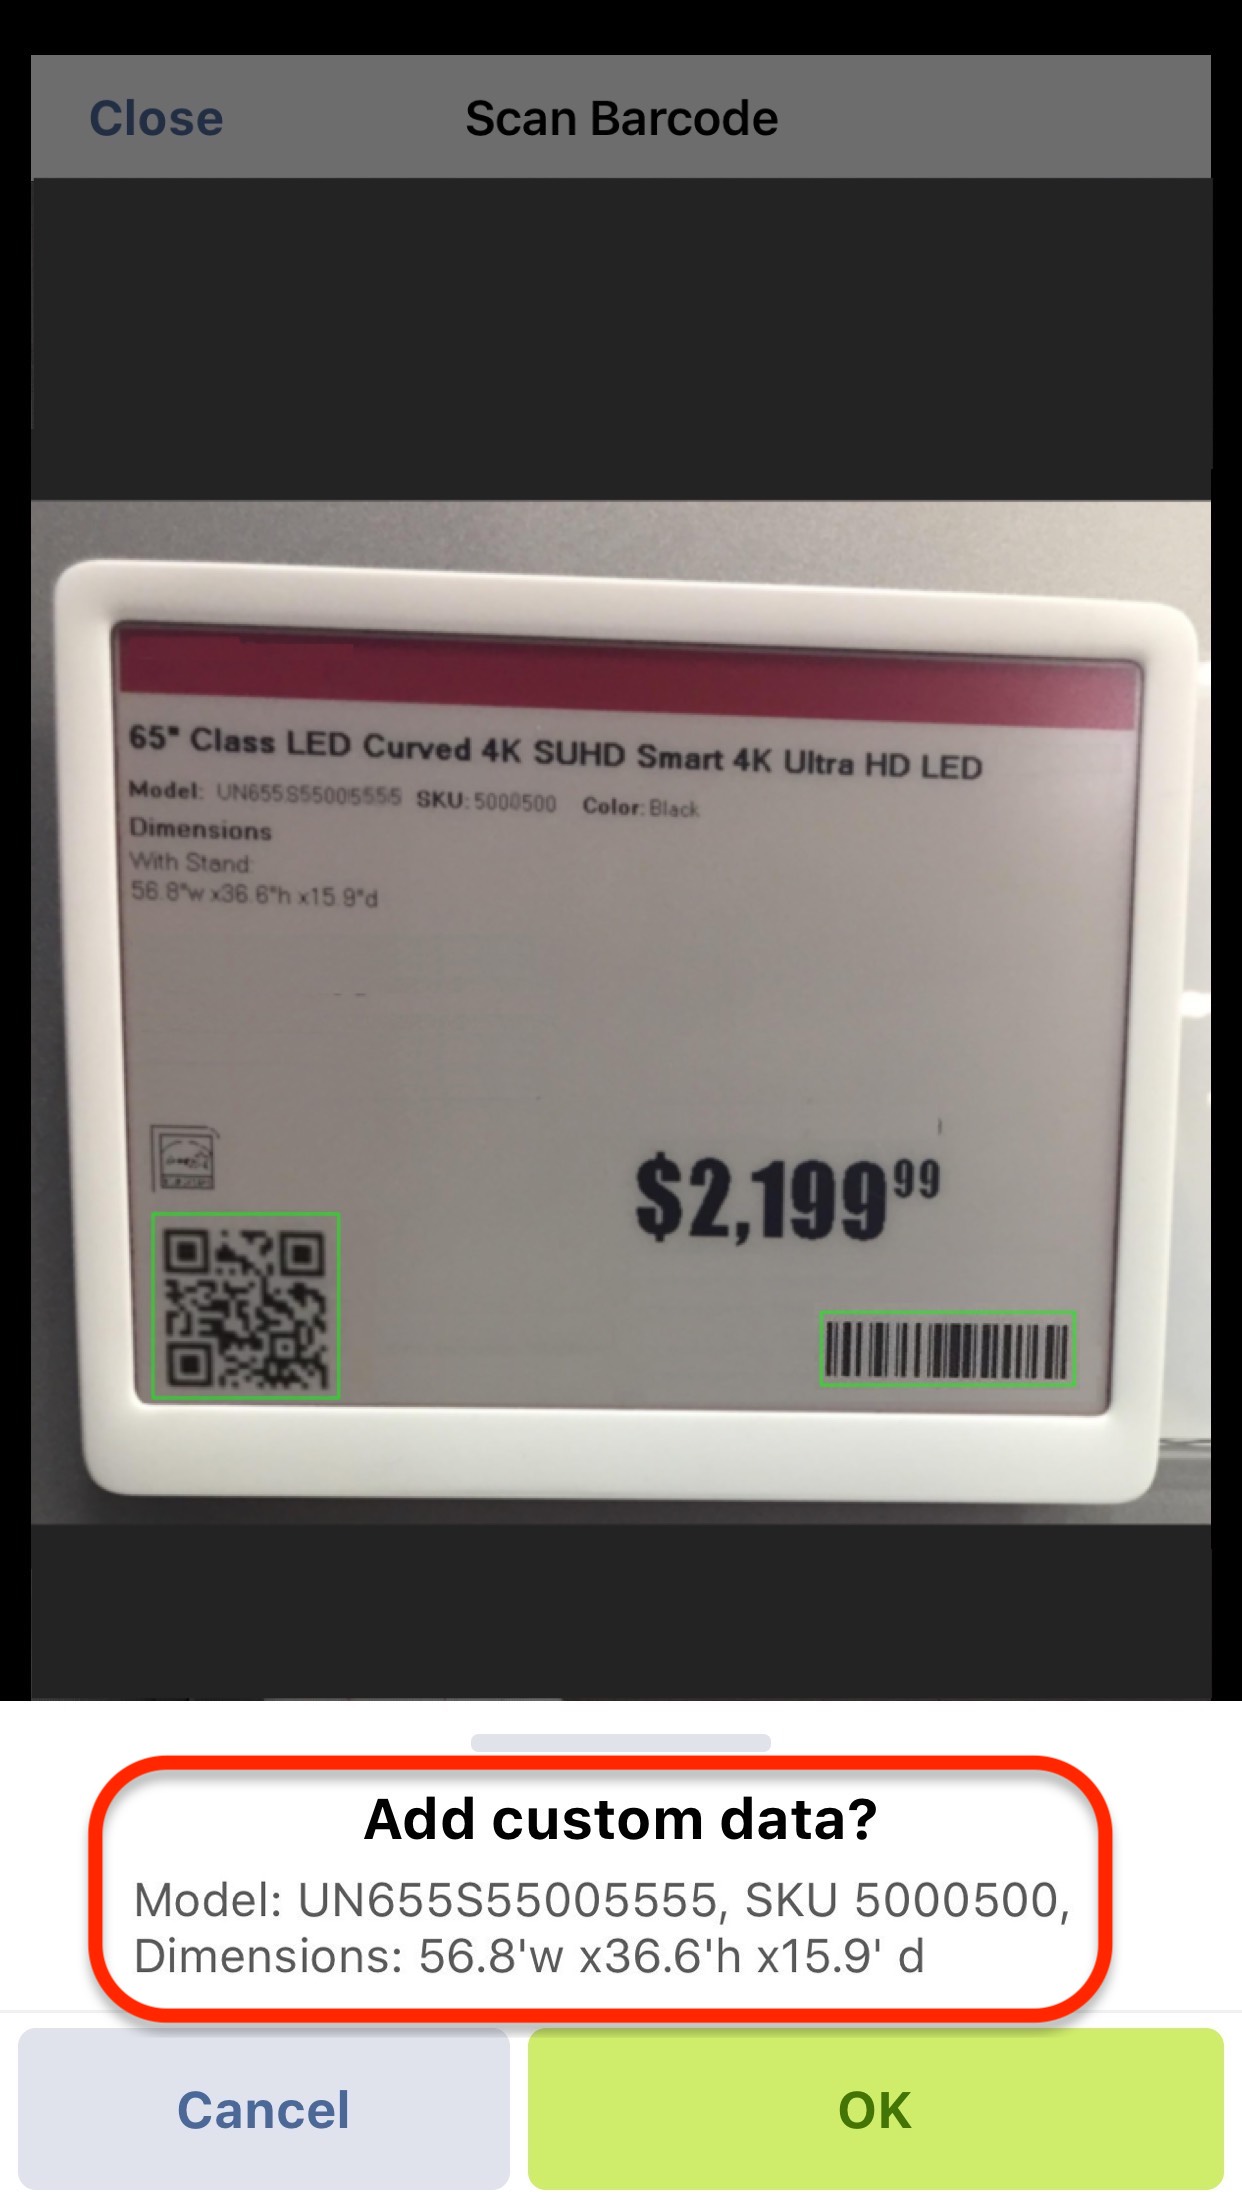
If you are using the iOS barcode scanner, then review the data stored in the scanned barcode and tap “OK” to save it.
How to View the Captured Barcode Data
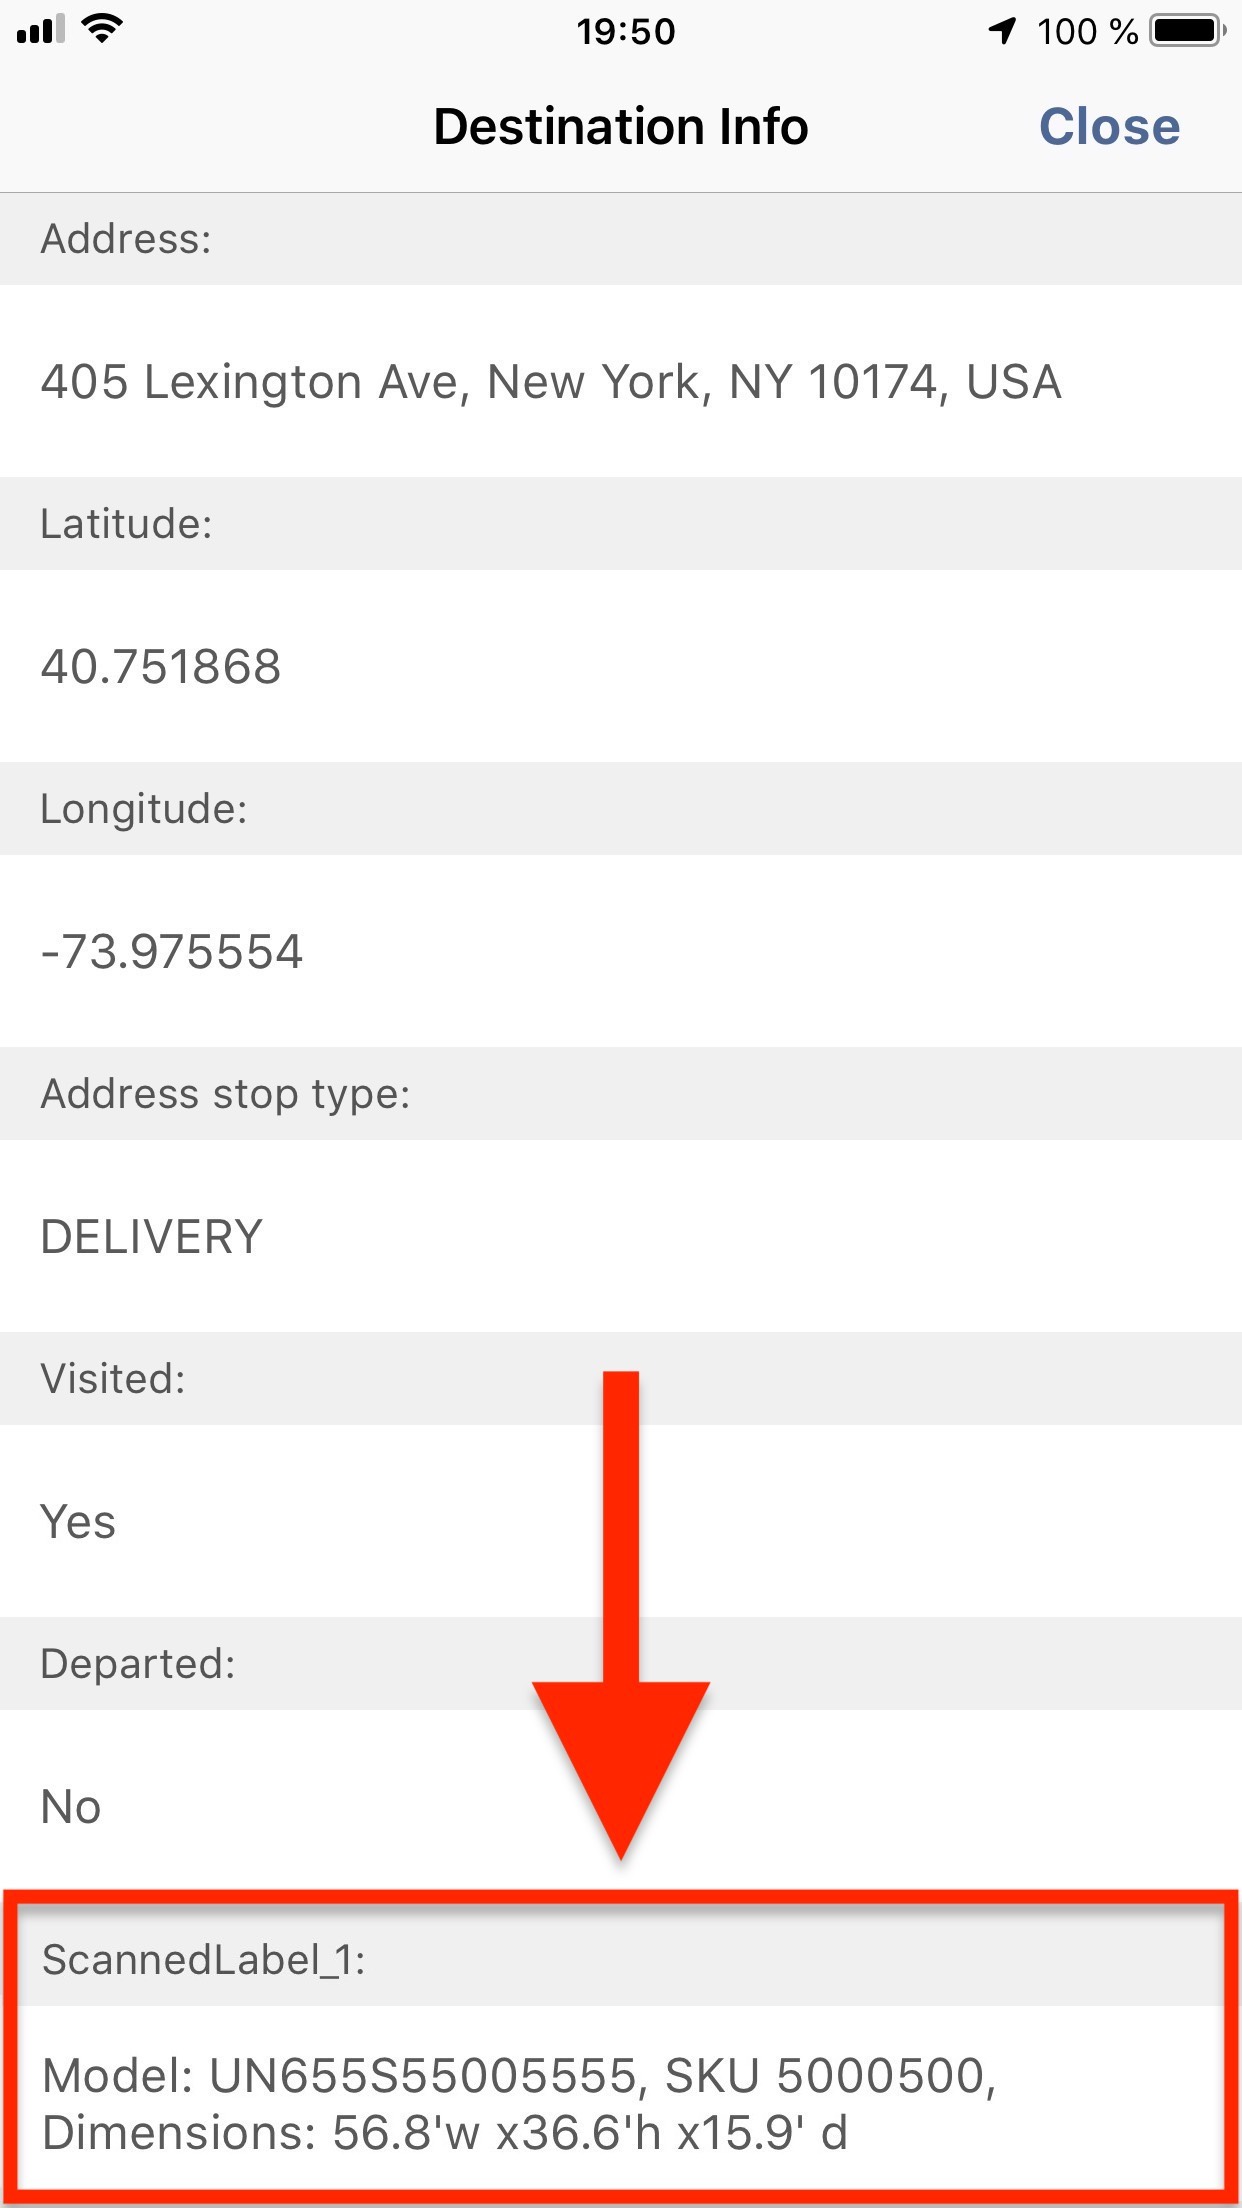
Once the barcode has been scanned, the “Stop Info” screen on Android or the “Destination Info” screen on iOS will open automatically (if this is defined in the settings). The information captured from the scanned barcode is then added to the “Custom Data” section of the corresponding stop on Android or as custom data to the corresponding stop on iOS.
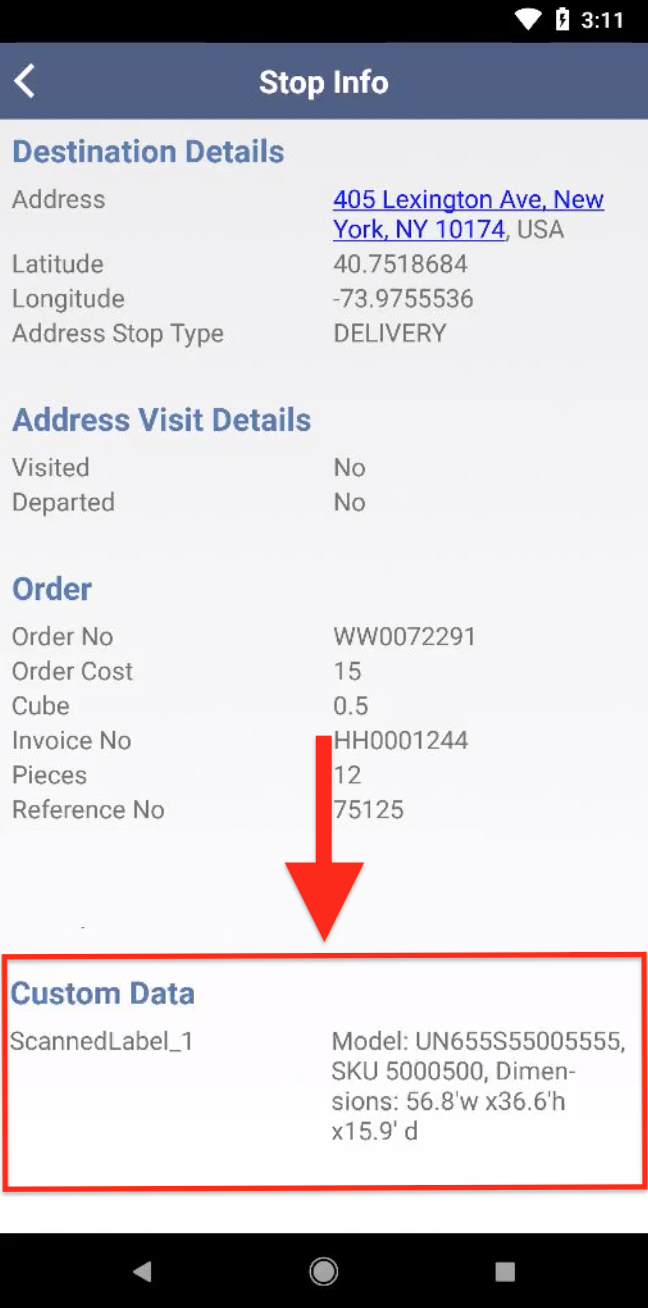
Alternatively, you can check the “Custom Data” section of the stop manually. To do so on Android, tap on the stop that you want to check.
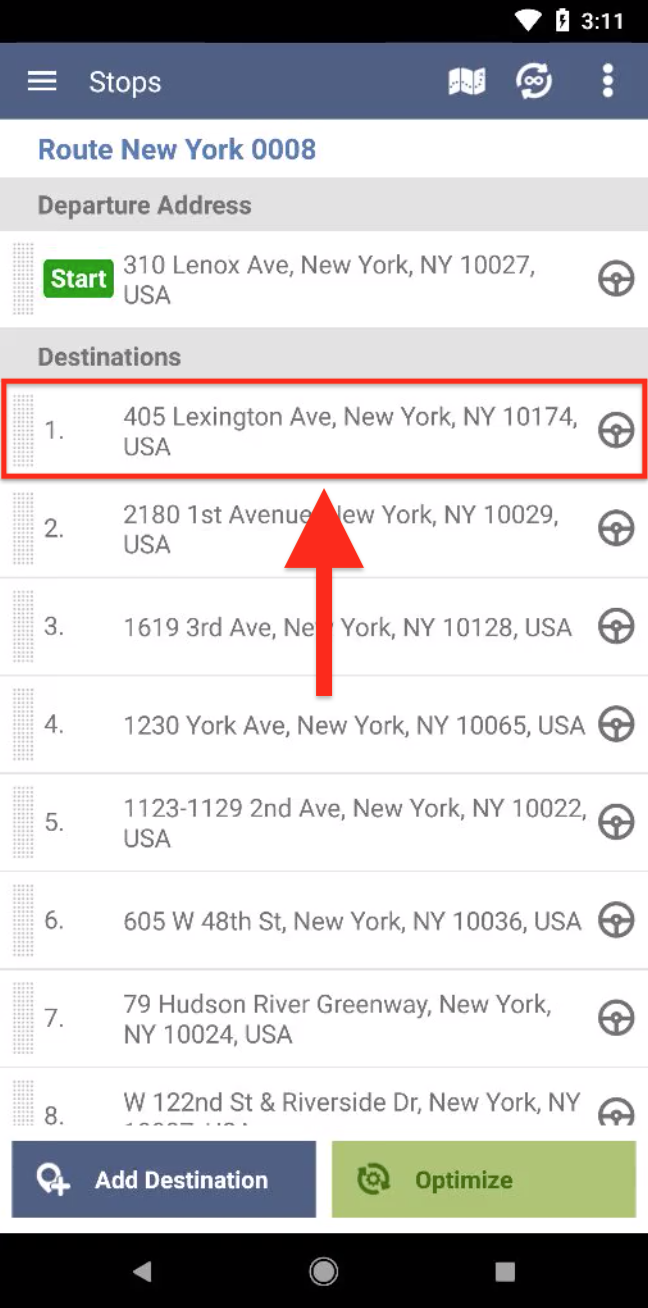
Thereafter, select “Stop Info” from the stop’s menu and scroll to the “Custom Data” section.
For iOS, you can check the “Custom data” section in a similar way. First, tap on the stop that you want to check and then select “Destination Info”.
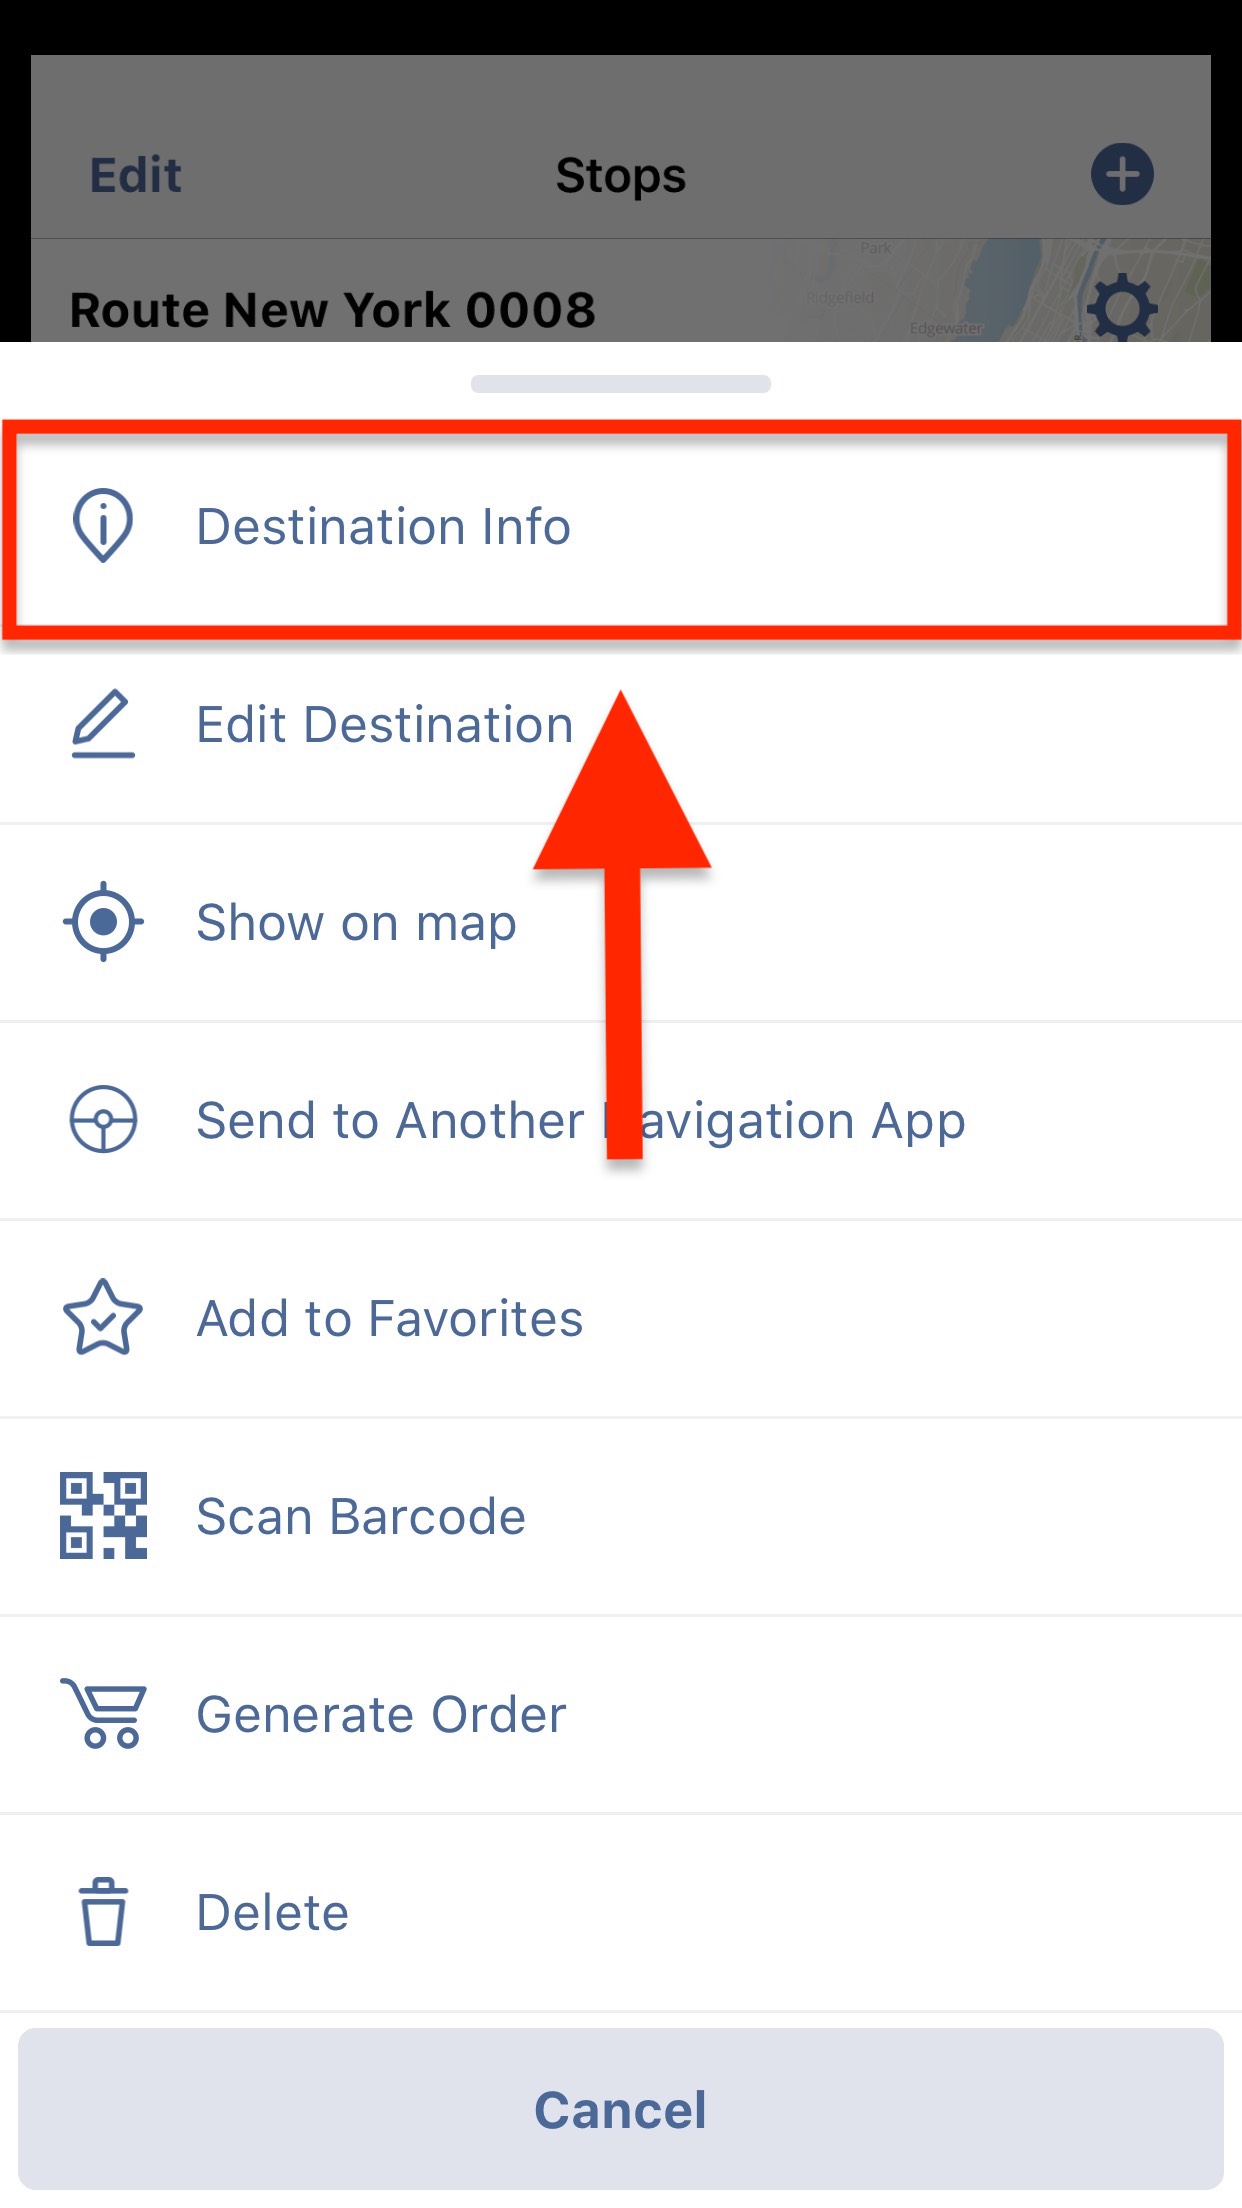
Thereafter, scroll down to the “Scanned Label” section where the data captured from the barcode will be displayed.

How to Adjust the Barcode Scanner’s Settings
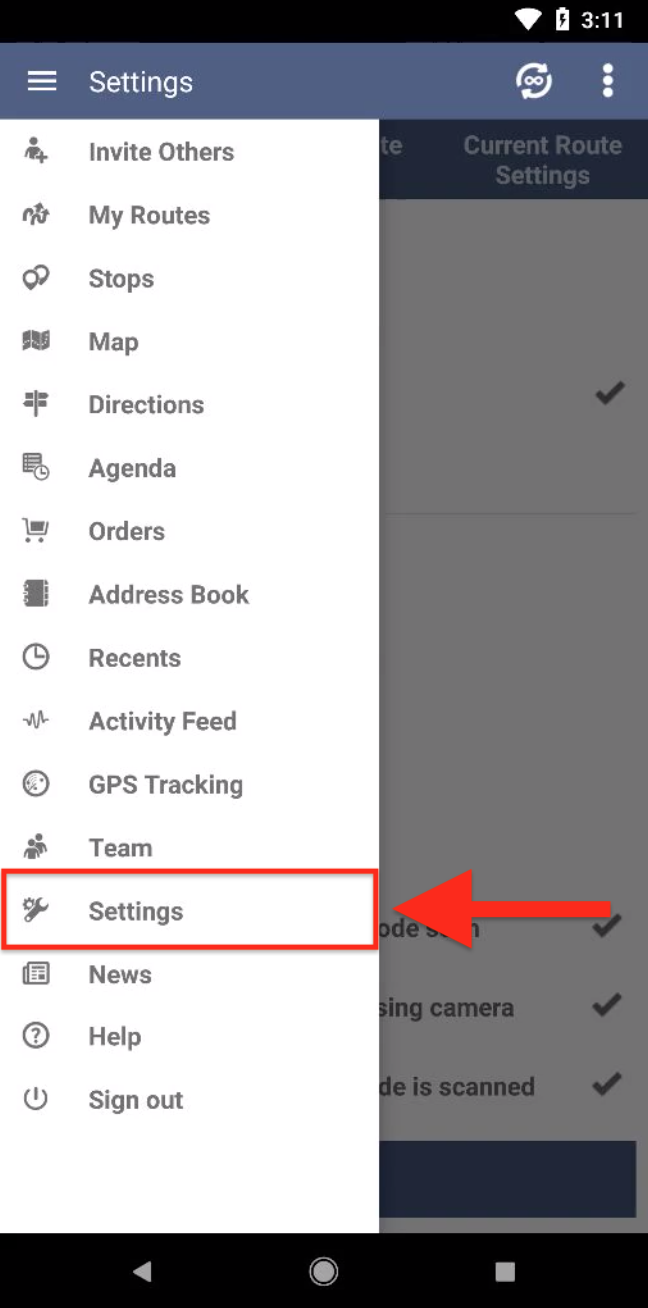
- Step 1: To adjust the settings of the barcode scanner, first go to “Settings” from the navigation menu.
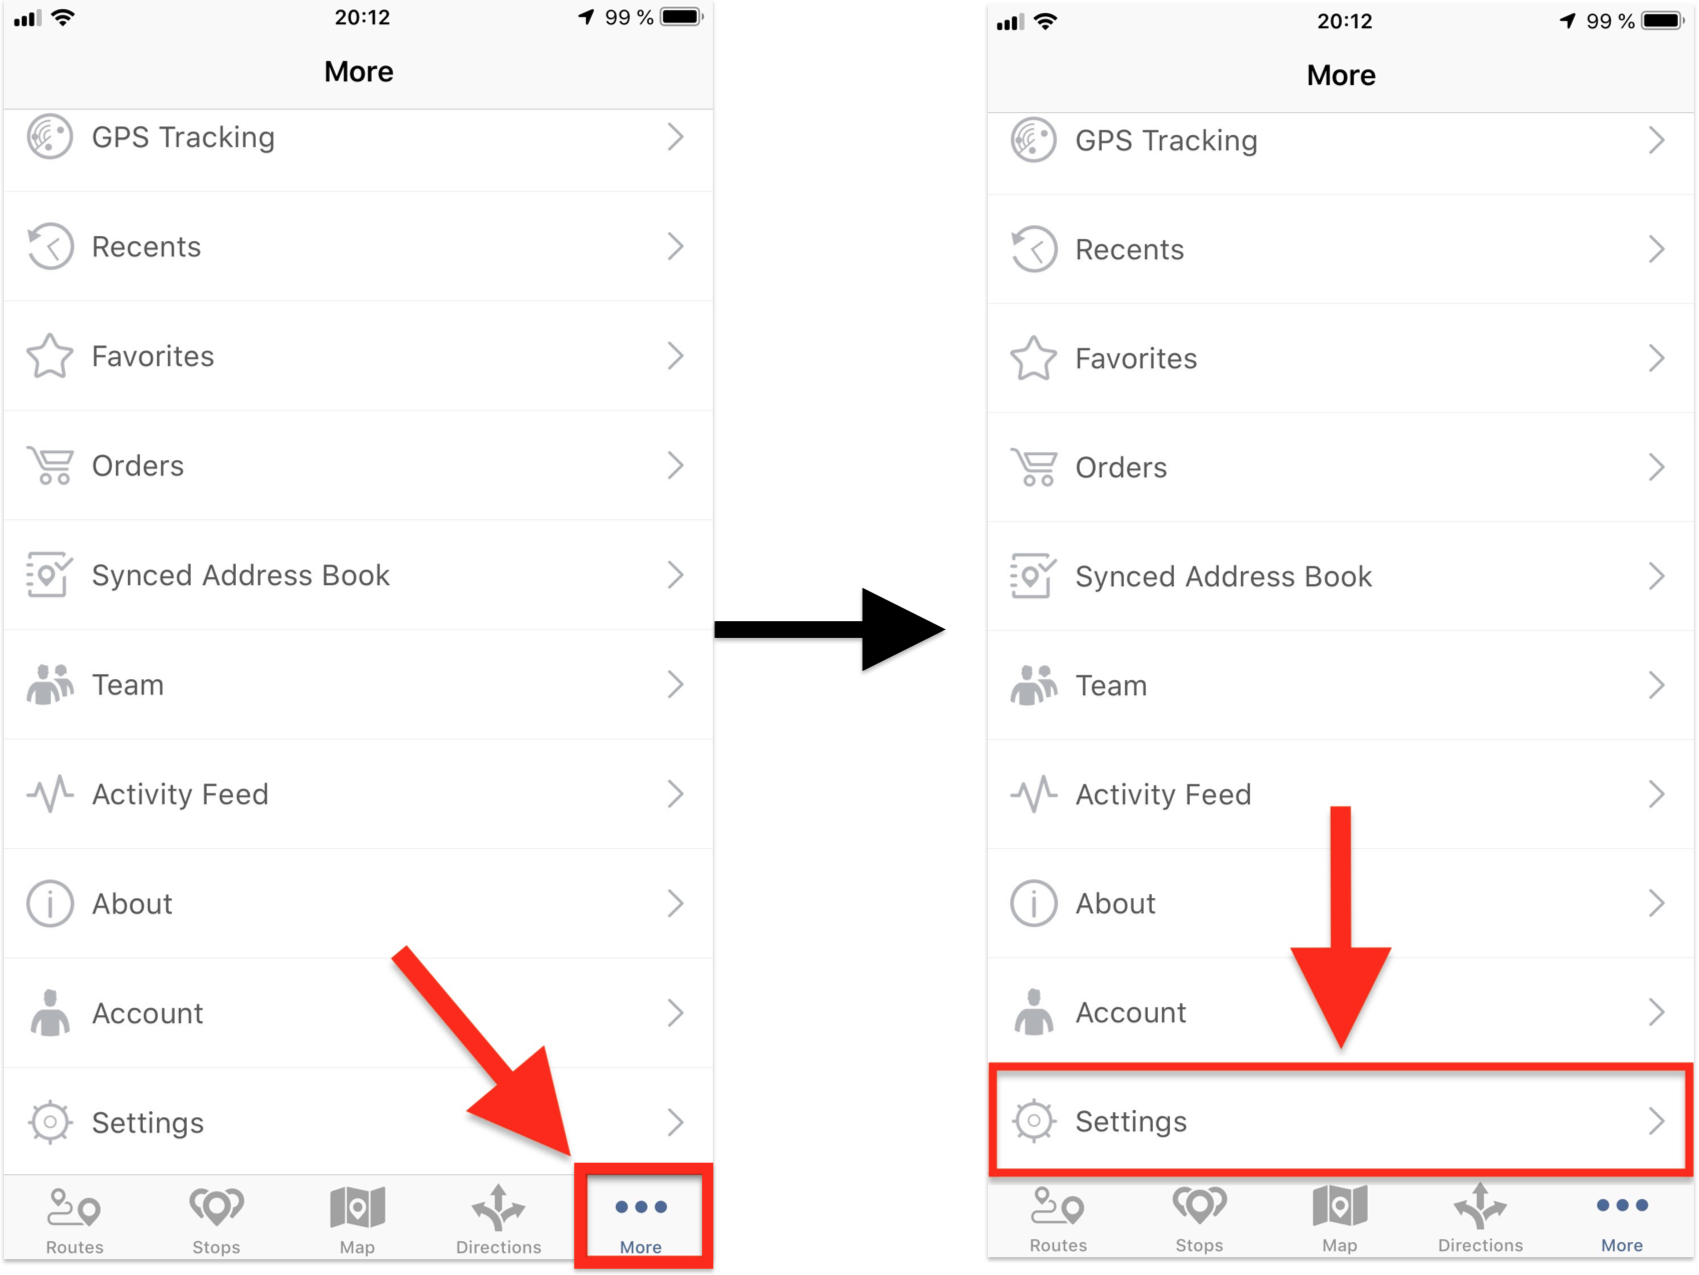
If you are using the iOS barcode scanner, first go to “More” from the navigation menu at the bottom of the screen and then select “Settings”.
- Step 2: Scroll down to the “Barcode Scanner” section, where you can adjust the corresponding settings according to your preference.
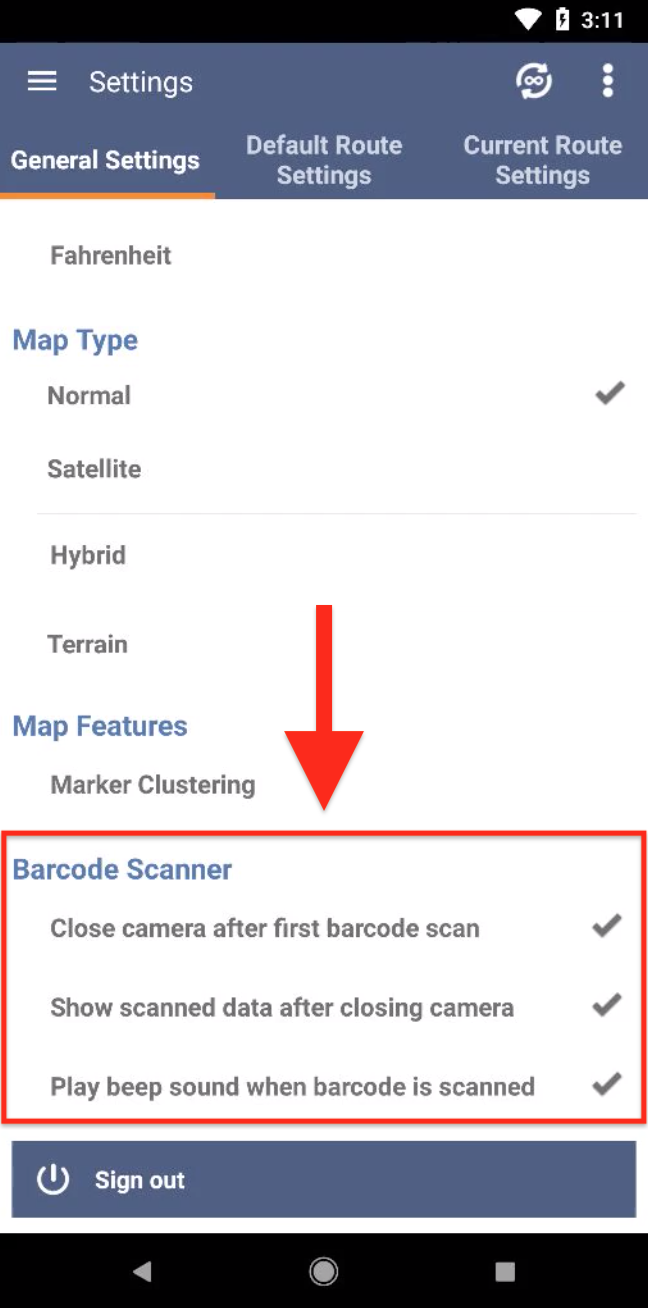
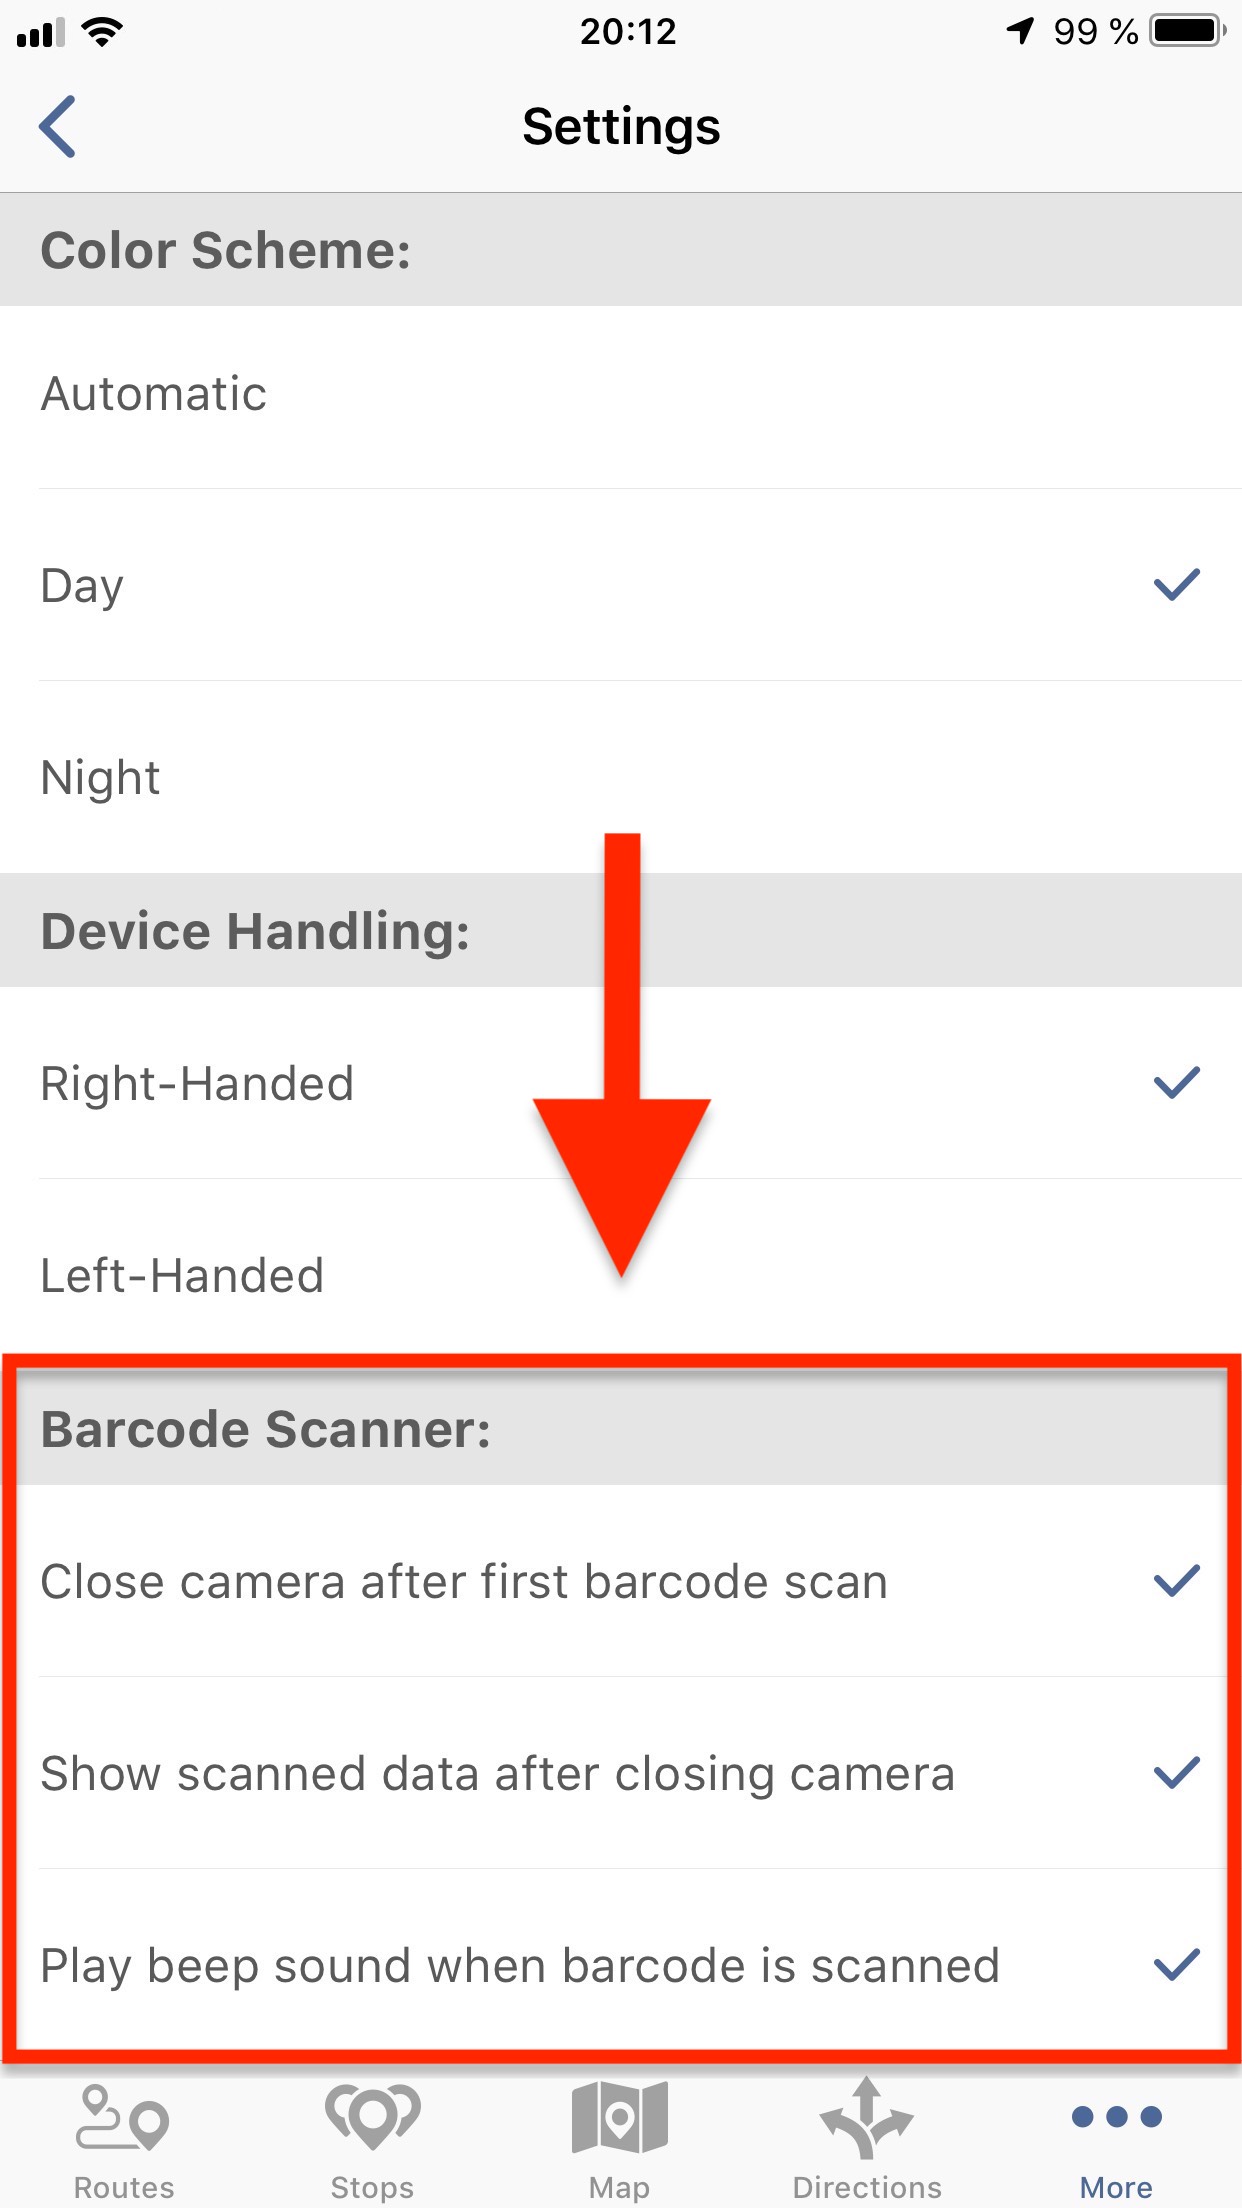
By default, you can scan or add one barcode per one stop on Android. Route4Me also provides additional note customizations that help you configure the number of barcodes that must be reconciled at a particular stop.
Want To See For Yourself How Route4Me Can Boost Your Profits?

