Planning routes with the Route4Me iOS app is an easy way to make your business more profitable.
Route4Me automatically arranges the order of stops on your route in the most efficient sequence, which reduces your operating costs and increases your profit margin. It also allows you to spend less time planning your routes, so you’ll be able to focus more on all the other things you need to do to run your business.
Good news! Route4Me just got even better, with four new features recently added to the iOS app:
- Add address via “press-and-hold” in the Address Book Map
- Search for stops
- Facial recognition
- Google-based single sign-on
Below, we’ll explain the benefits of these new features and show you how to use them.
How to Use the Interactive Map to Add Contacts to Your Address Book on Your iPhone and iPad
Just like Route4Me’s Android app, Route4Me’s iOS app now allows you to add addresses to your Address Book as contacts directly from the interactive map. All contacts added to your Address Book from the map will be instantly synchronized in real-time across all associated computers and mobile devices. This feature makes it quicker to add new contacts, and it also helps you visualize the locations of your customers.
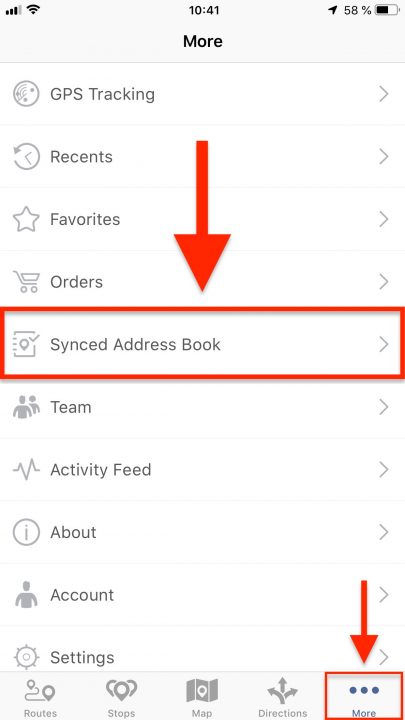
- In your Route4Me account, go to “More” from the navigation menu at the bottom of the screen.
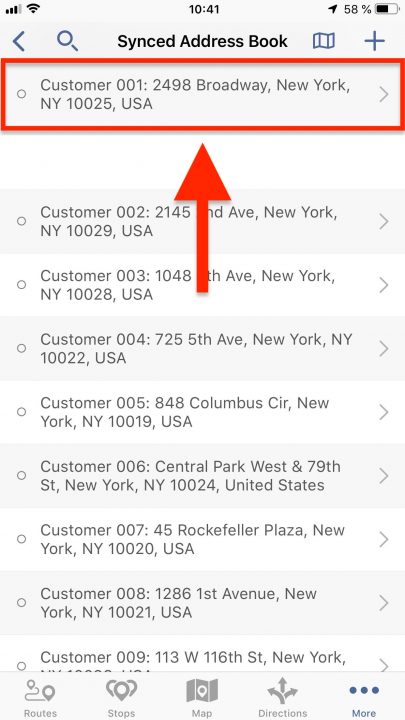
- Select “Synced Address Book.”
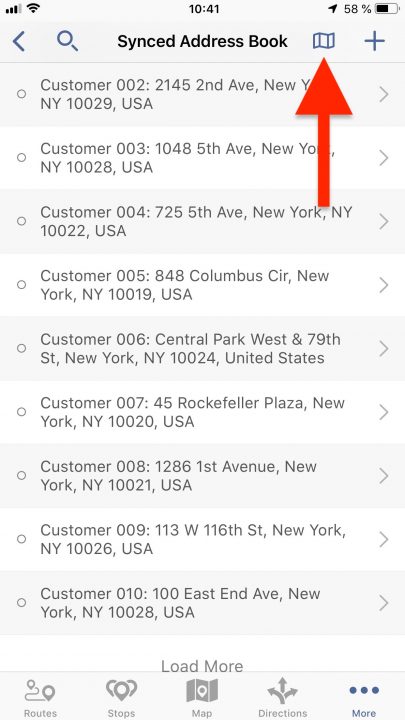
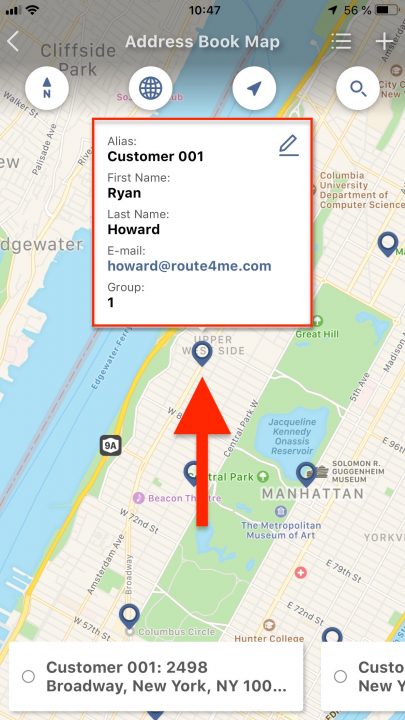
3. Tap on the map icon in the top-right corner of the screen to open the Address Book Map.
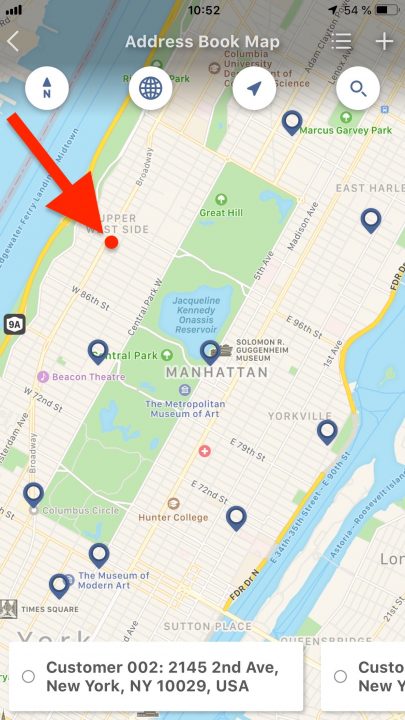
4. In the Address Book Map, tap and hold on any spot that you want to add to your Address Book as a contact. When you select a spot on the map, the app adds the nearest valid address located next to the corresponding spot.
5. Confirm that the address is correct, then fill out the rest of the contact information that you want to attach to the corresponding address.
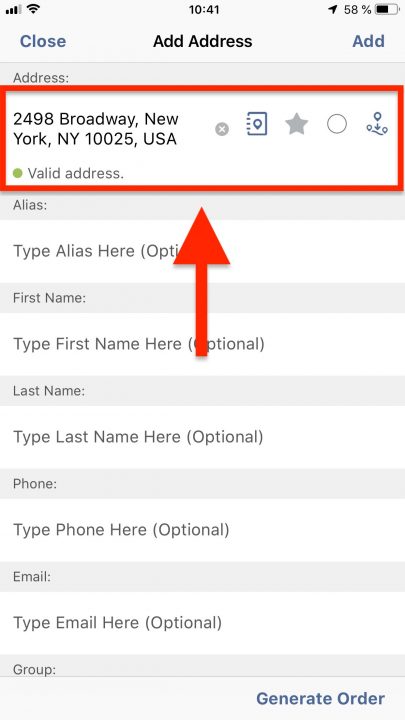
6. Select “Add” in the top-right corner of the screen to save the address and its contact information.
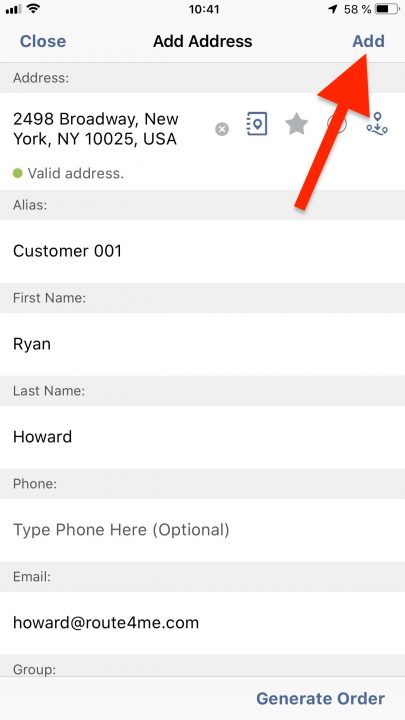
7. All contacts added from the interactive map can be found in your Address Book, where you can manage, modify, and use them for planning routes. Once the address is saved to your Address Book, you can view it on the Address Book Map as well.
How to Search for Stops on Your iPhone and iPad
Depending on the size of your operation, you might have dozens or even hundreds of stops on any given day. In that case, manually scrolling through your stops to find information about a particular stop can be quite time-consuming. The Route4Me iOS app’s stop search feature makes it much easier to find what you need.
- In your Route4Me account, go to “Routes” from the navigation menu at the bottom of the screen.
- Open the route that contains the stop you want to search for.
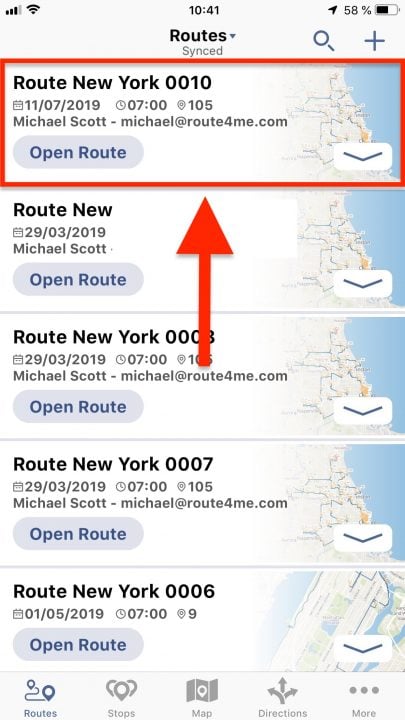
3. In the “Stops” section of the opened route, you can review how many stops the route contains.
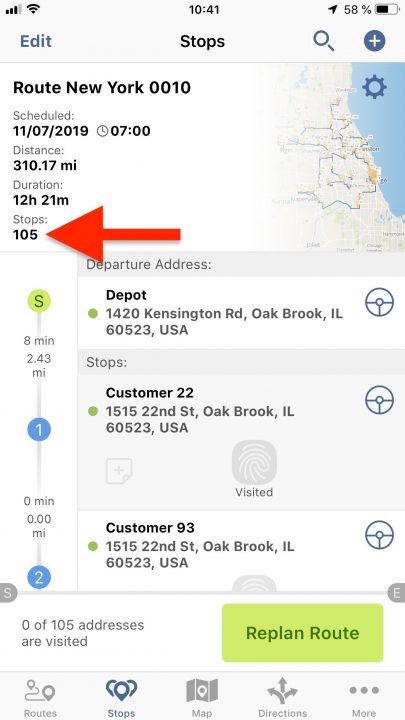
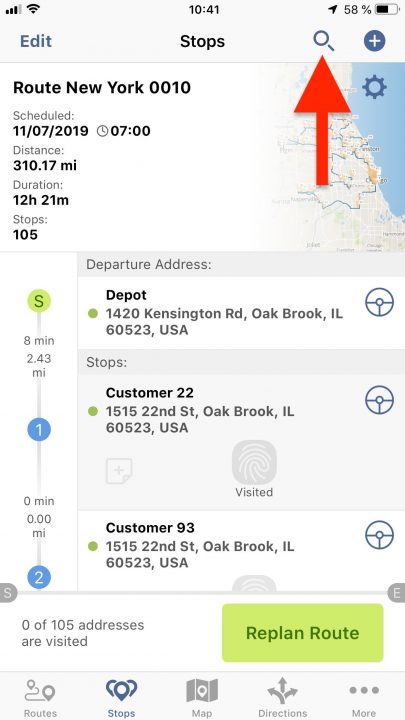
4. Tap on the magnifying glass icon in the top-right corner of the “Stops” screen.
5. Enter identifying information about the stop into the search field.
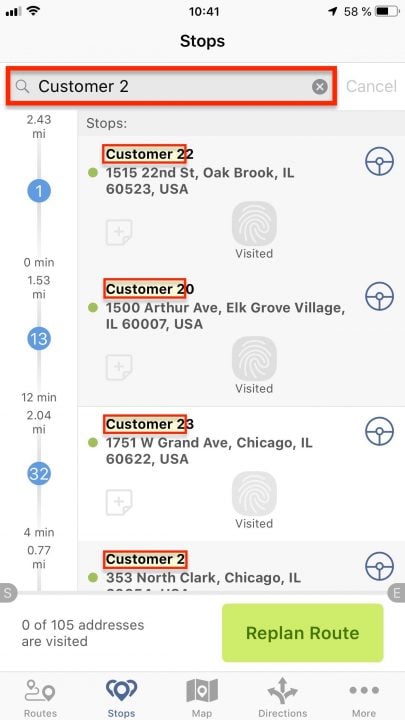
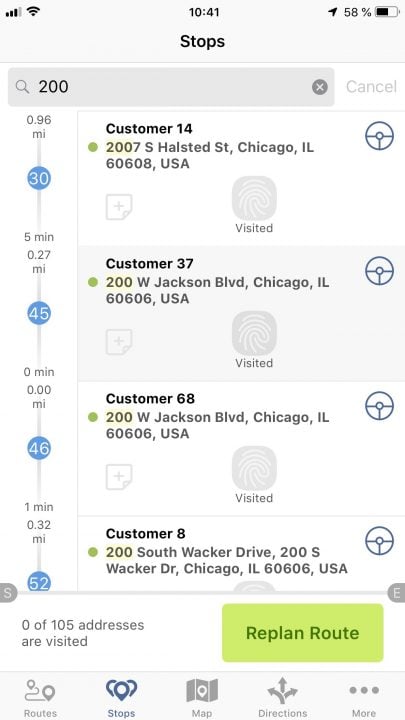
The Route4Me iOS app allows you to conduct the search by multiple parameters. You can search for stops by:
- Alias
- Address
- Order No.
- Invoice No.
- Reference No.
- First Name of Contact
- Last Name of Contact
- Contact’s Phone Number
- Contact’s Email Address
- Group Values
- Custom Data
- Text contained in the Notes that are attached to the corresponding stop
6. Once you have found the stop you were searching for, you can manage it, modify it, and use it to navigate.
How to Use Face ID to Log in to Your Route4Me iPhone and iPad App
Using facial recognition to log in to your Route4Me account increases the security of your sign-in process and saves time by eliminating the need to manually input your credentials.
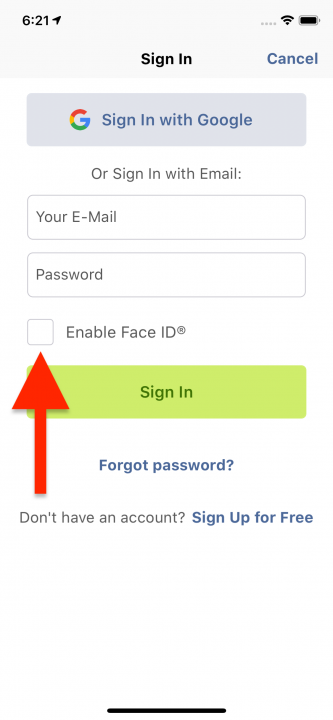
- Make sure Face ID is enabled on your device. To learn more about enabling Face ID on your iPhone, visit this Apple Support Page. Next, check the “Enable Face ID” box on the main log-in screen.
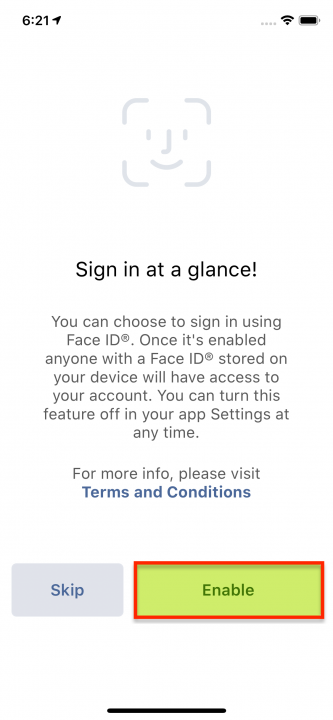
Read the Terms and Conditions, as well as the general description of the feature, and select “Enable.”
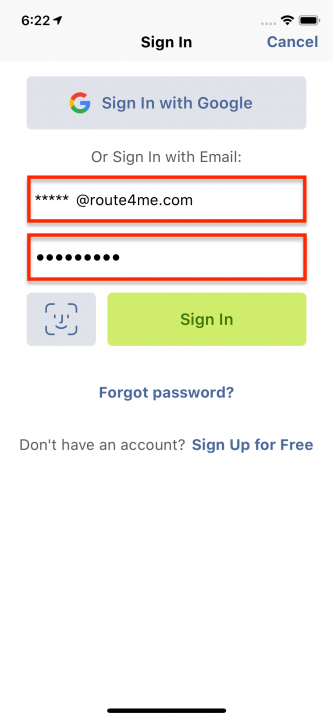
2. After enabling Face ID for the Route4Me iPhone or iPad app, you need to sign in with your email and password so that the app can save the corresponding credentials and re-use them when you attempt to log in with Face ID.
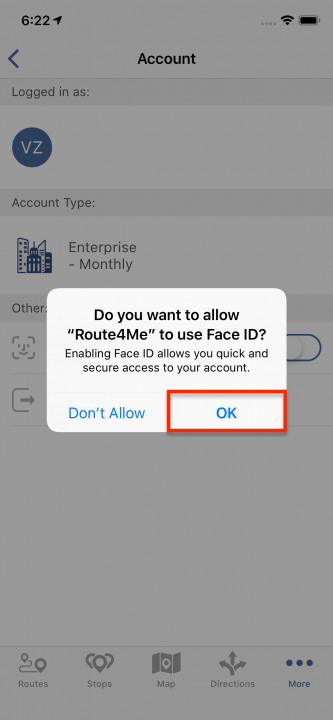
3. Tap “OK” to allow the Route4Me iPhone or iPad app to use Face ID.
4. Once Face ID is fully enabled for your Route4Me iPhone or iPad app, you’ll receive a notification. Tap “OK” to proceed.
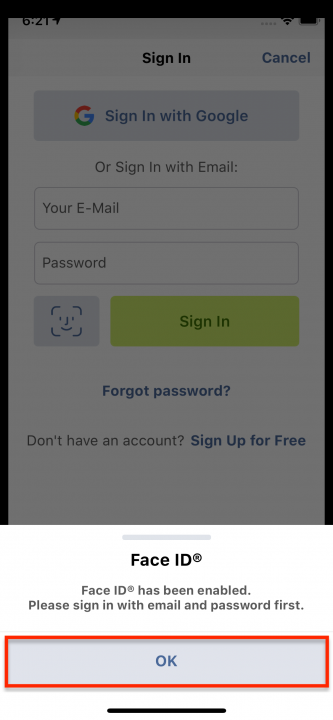
5. After Face ID is enabled, you can use it to log in to the Route4Me iPhone or iPad app by tapping on the corresponding icon on the main sign-in screen.
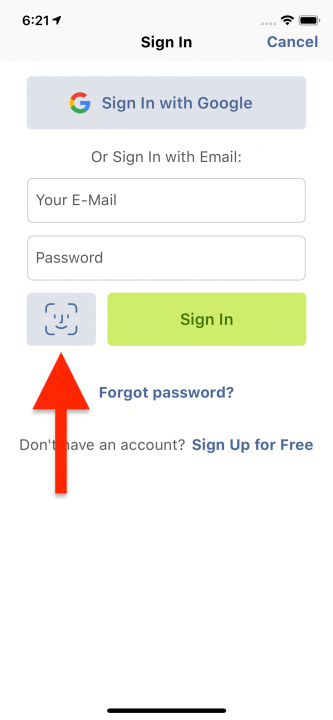
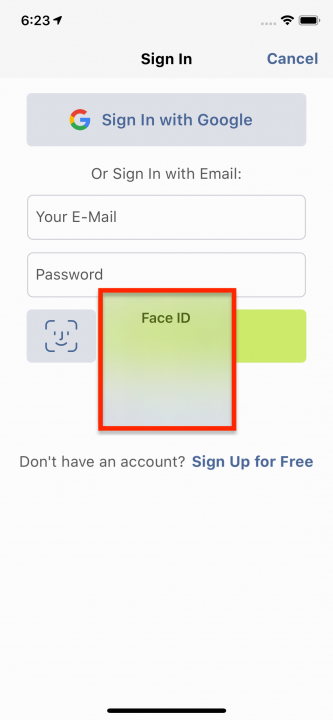
Then, your device will use Face ID to log in to the Route4Me iPhone or iPad app.
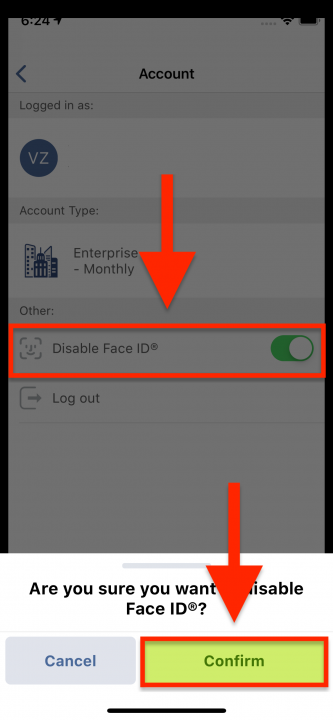
6. To disable Face ID for the Route4Me iPhone or iPad app, log in to your account, go to “More” in the navigation menu at the bottom of the screen, and select “Account.” On the “Account” screen, tap on the corresponding switch button to disable Face ID for the Route4Me iPhone or iPad app. Select “Confirm” to complete the process.
How to Use Your Google Account to Register and Sign in to Your Route4Me iPhone and iPad App
For your convenience, Route4Me allows you to use a Google-based single sign-on for registering and signing in to a Route4Me account. This eliminates the need to memorize a new password, and you benefit from Google’s world-class security infrastructure.
A single sign-on also reduces the amount of time your team members need to spend on registering their own accounts and dealing with password-related issues, since they only need to remember and enter a single set of credentials.
How to Register for a New Route4Me Account with Google-based Single Sign-on
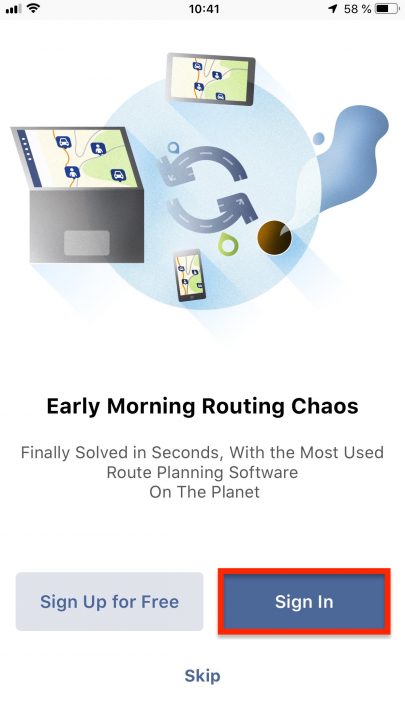
- Tap on the “Sign In” button on the main sign-in screen.
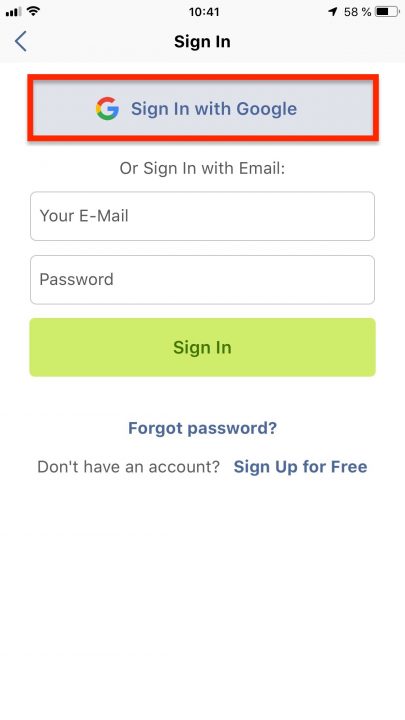
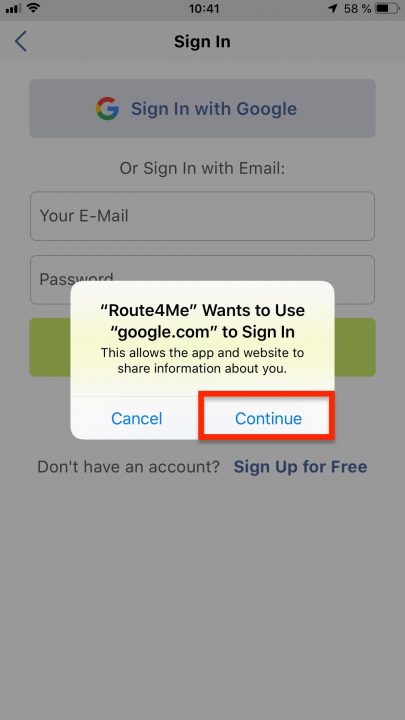
2. Select “Sign In with Google”. When prompted, select “Continue” to agree and proceed.
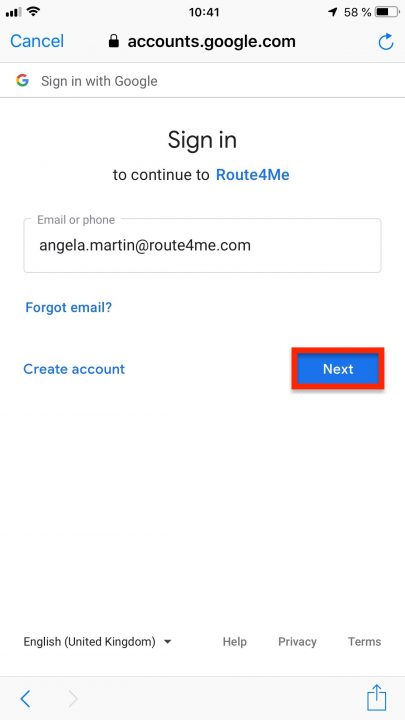
3. Enter your Google email address (Gmail) or the phone number associated with your Google account into the corresponding field and select “Next”.
4. Enter your Google account (Gmail) password into the corresponding field and select “Next”. Depending on your Google verification settings, you may need to use additional methods of authentication.
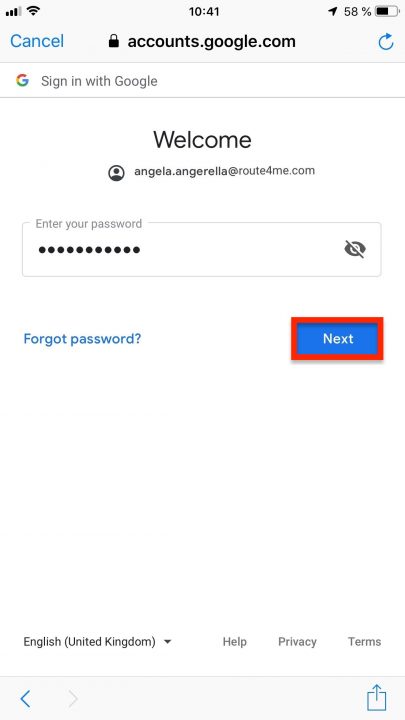
When you use Google-based single sign-on for the first time without having a Route4Me account, the app automatically registers a new Route4Me Mobile Free account and links it to your Google Account. You can learn more about different Route4Me mobile subscription plans here.
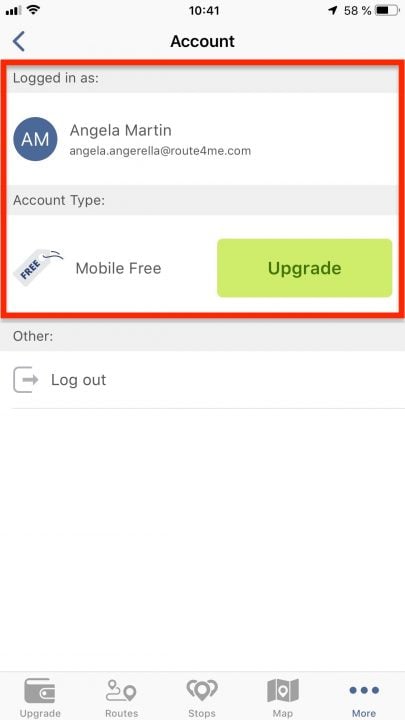
How to Log in to Your Route4Me Account with Google-based Single Sign-on
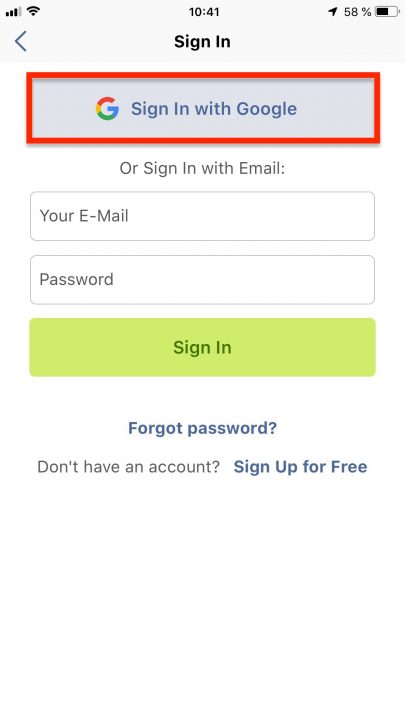
When you have a Route4Me account that is linked to your Google account, you can sign in with Google-based single sign-on in a matter of seconds, without having to remember and manually input your credentials.
To do so, tap on the “Sign In with Google” button on the main sign-in screen.
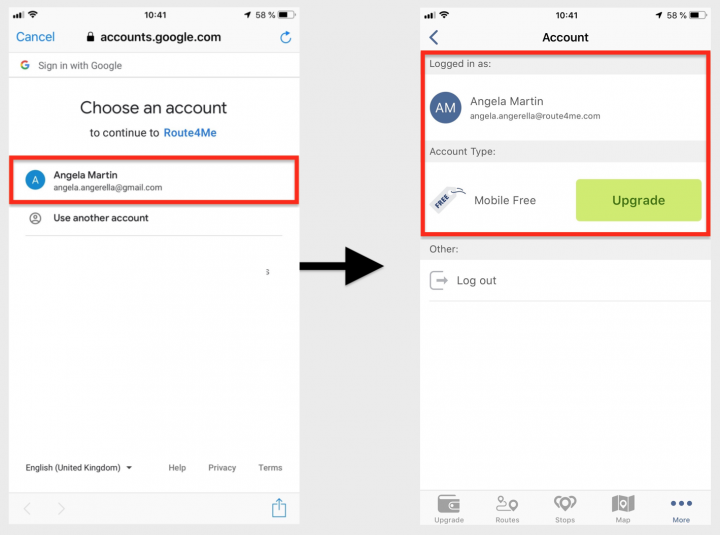
Then, select the Google account associated with your Route4Me account from the list. Once you select your Google account, the app will instantly sign you in.
To learn more about signing in to non-Google apps with your Google Account, visit this Google Account Help page.
So, what do you think about these new features? Do you have any questions? Feel free to let us know in the comments section below.
